This article provides the steps to package and deploy Provider Hosted App.
I assume you are aware of the following:
- Provider Hosted Environment readiness
- IIS site setup for remote web deployment
- Provider Hosted App Project Setup using VS 2013
- Registering an app in the App Registration Page
- Setting up Publishing Profile (using high trust certificate)
- Package and deploy the .app file in App Catalog from SharePoint Project
Steps to Package & Deploy
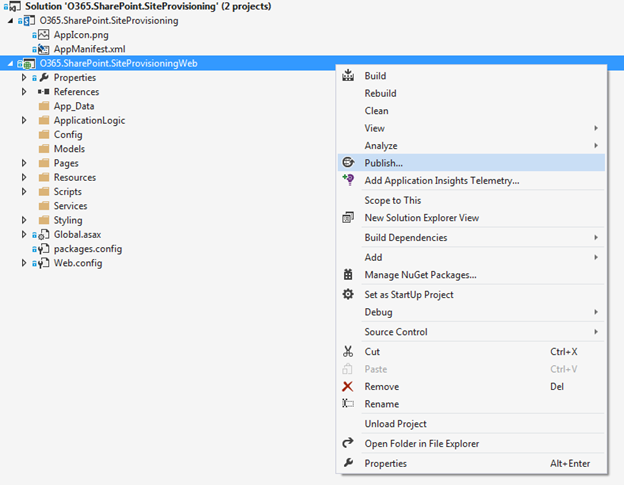
- Right click on the Web Project and select Publish

- Click Next (Note: If required update the IIS Web Application Name, ClientId, ClientSigningCertificatePath, ClientSigningCertificatePassword and IssuerId in the publishing profile. In my case, I have configured all these during the project creation)
- In the connection tab select the Publish method as “Web Deploy Package” and update the Package location & Site name as per your environment (refer the below example). Click Next

- Select “Release” in the Configuration drop down and click Publish

- Now your package should be ready at the package location you have configured in the previous step

- Copy the app remote web package to the remote web server you wish to deploy
- Open the Command Prompt and traverse to the directory containing the package files
- Run the following command:
/y - Example: SiteProvisioningWeb.deploy.cmd /y
- Now the deploy command should have deployed the files in the remote web server IIS website.
- Access the app and make sure the app is working with the logic you have written.
