Developing apps with Power Apps helps the business users solve business problems with easy-to-use tools that don’t require code / less code. In this article I am going to explain how to use a single form control associated with a SharePoint list to add/edit/view items using PowerApps.
I would assume you have the following setup
- SharePoint list
- Power App List Form connected with your SharePoint list
Following are the steps I am going to use to convert my form to support add/edit/view functionalities
Step – 1
The Param function retrieves a parameter passed to the app when it was launched. If the named parameter wasn’t passed, Param returns blank. The user will be redirected to the respective form based on ID and Mode parameters.

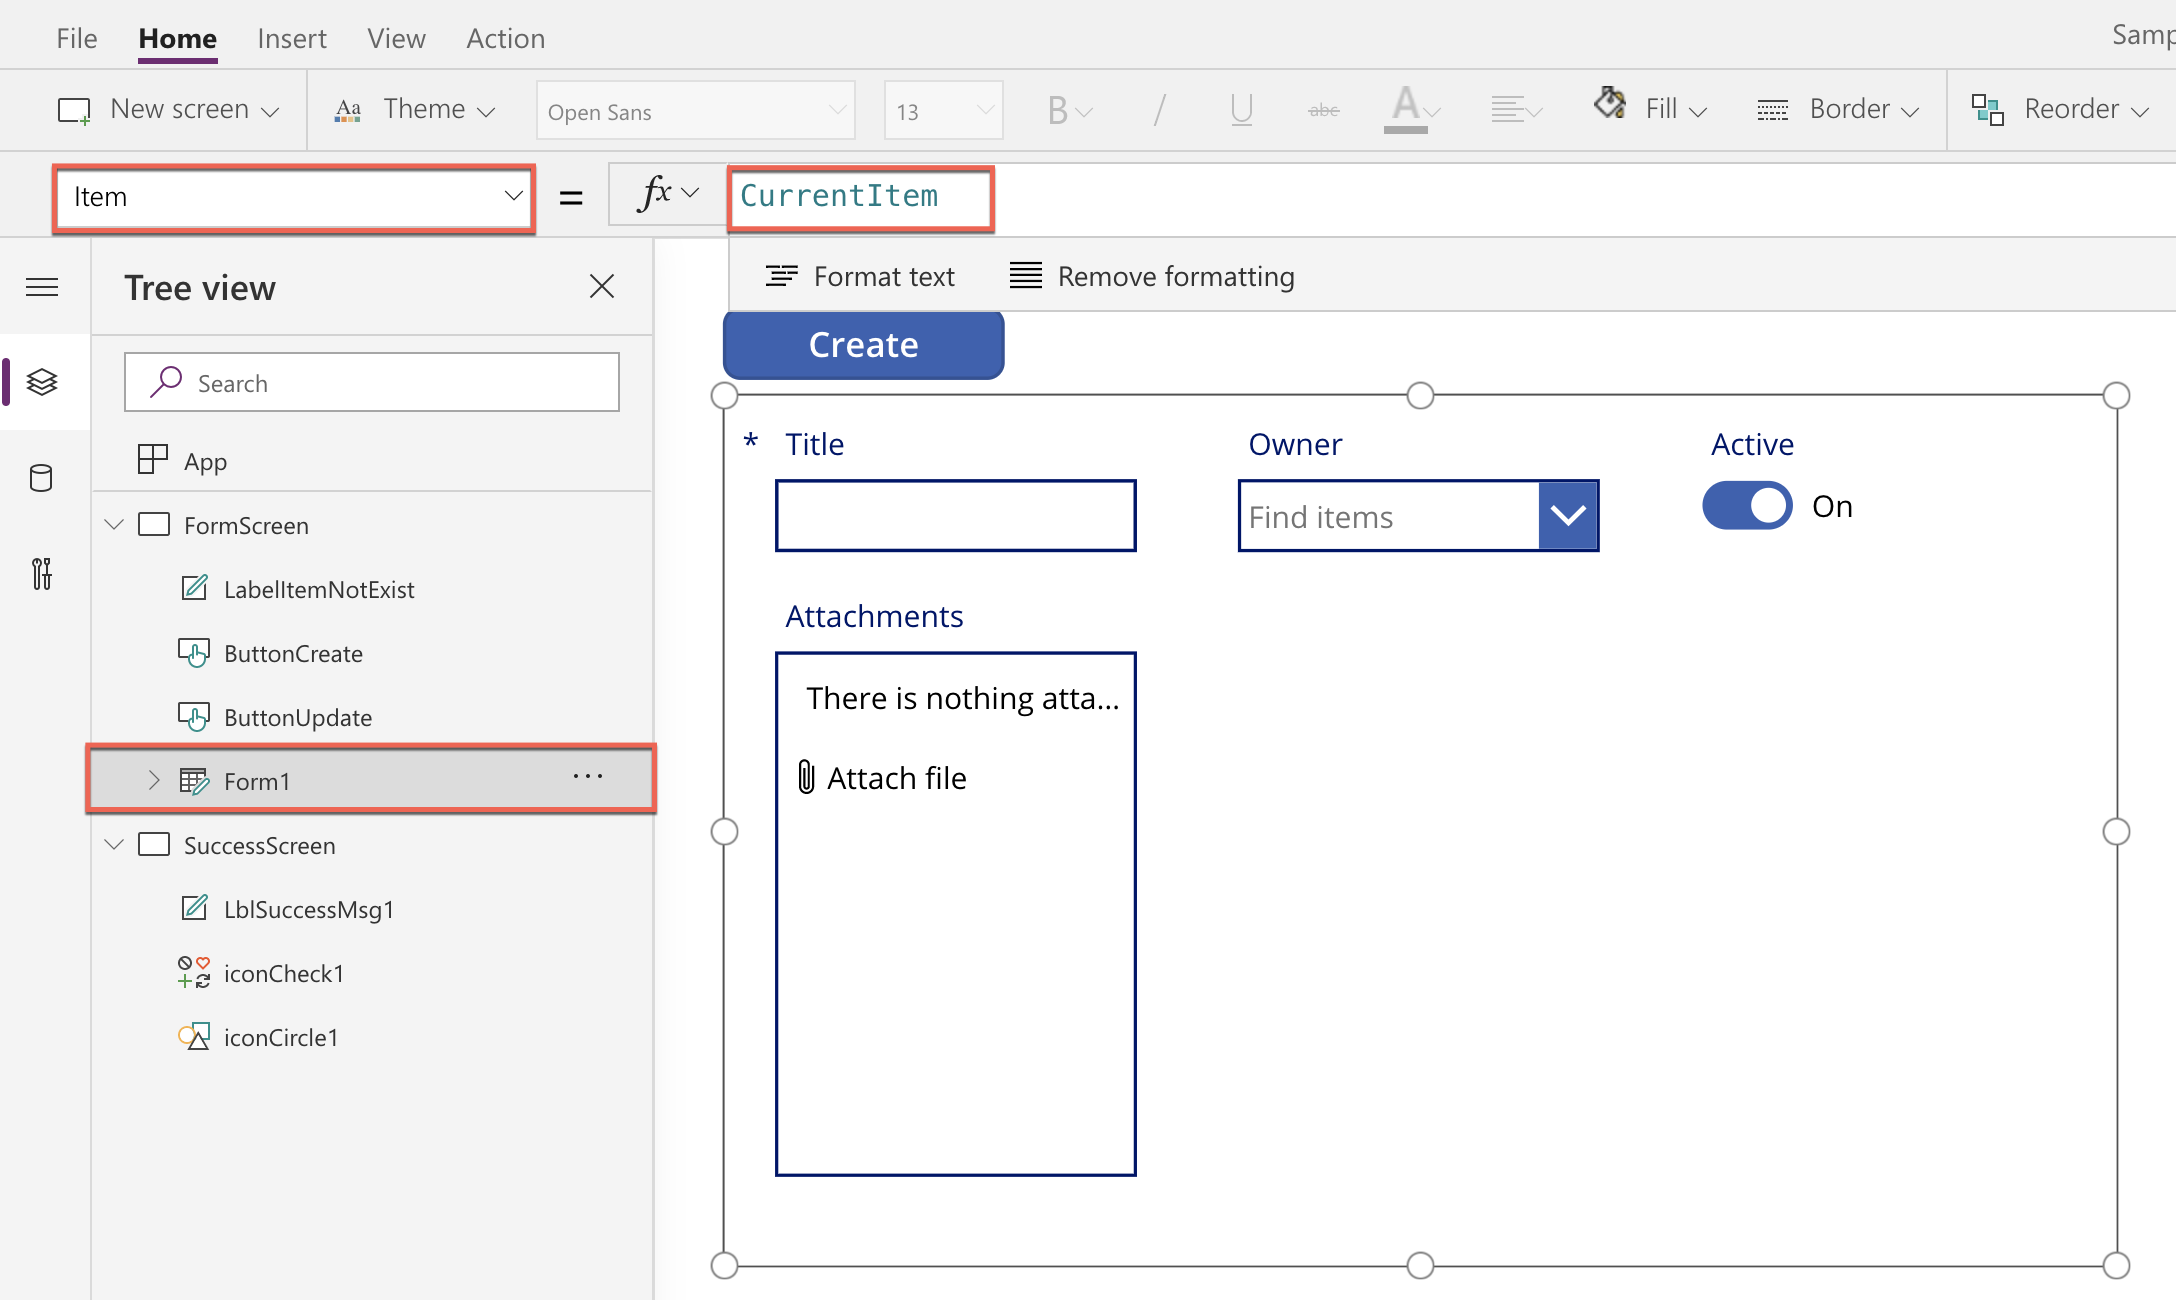
Step – 2
Assign the CurrentItem variable we have calculated in Step 1 here
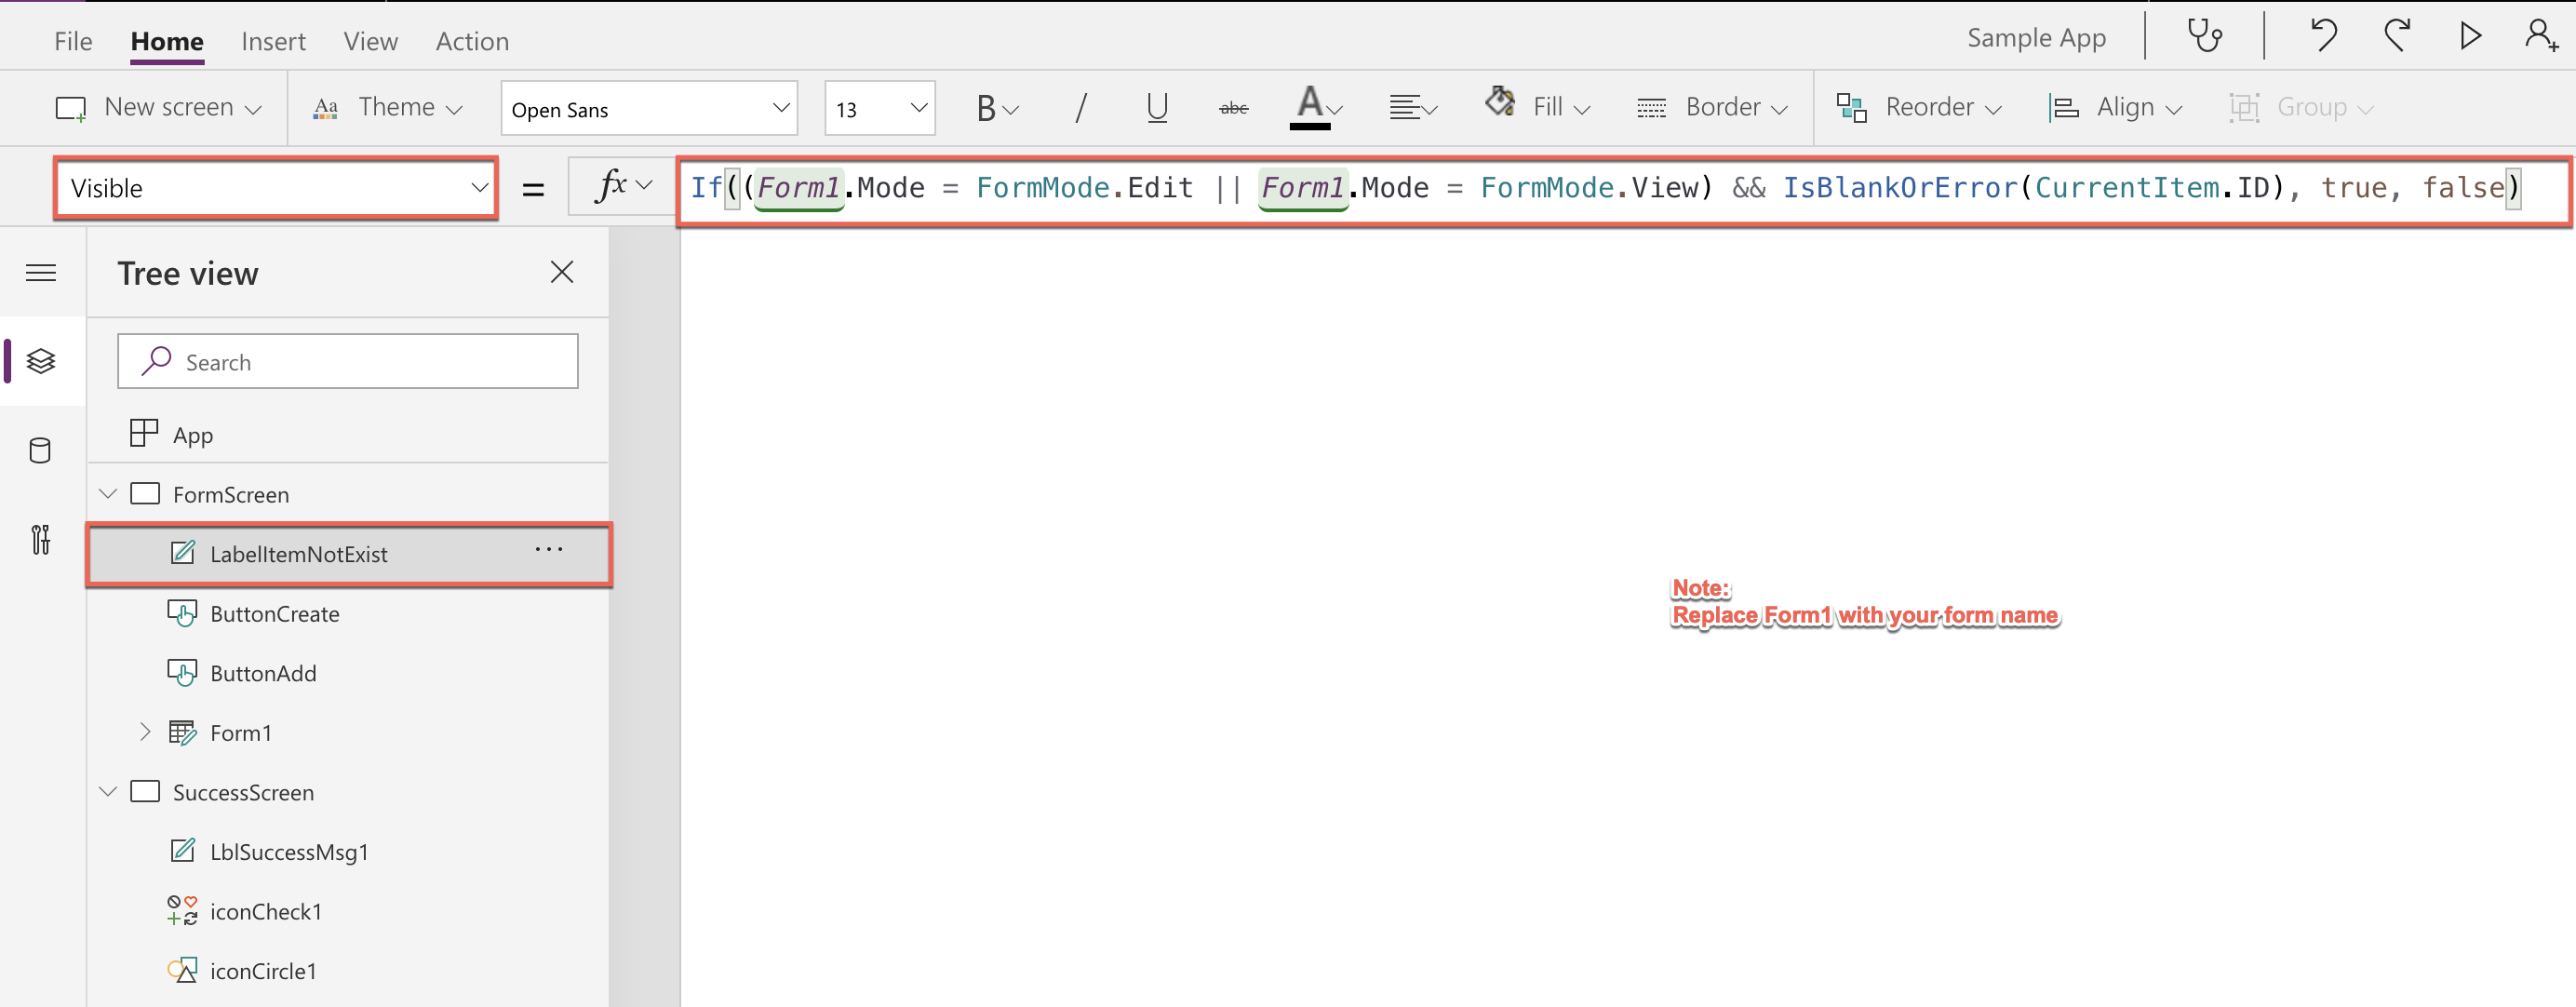
Step – 3
Add a Label control and change its visibility expression as shown below:
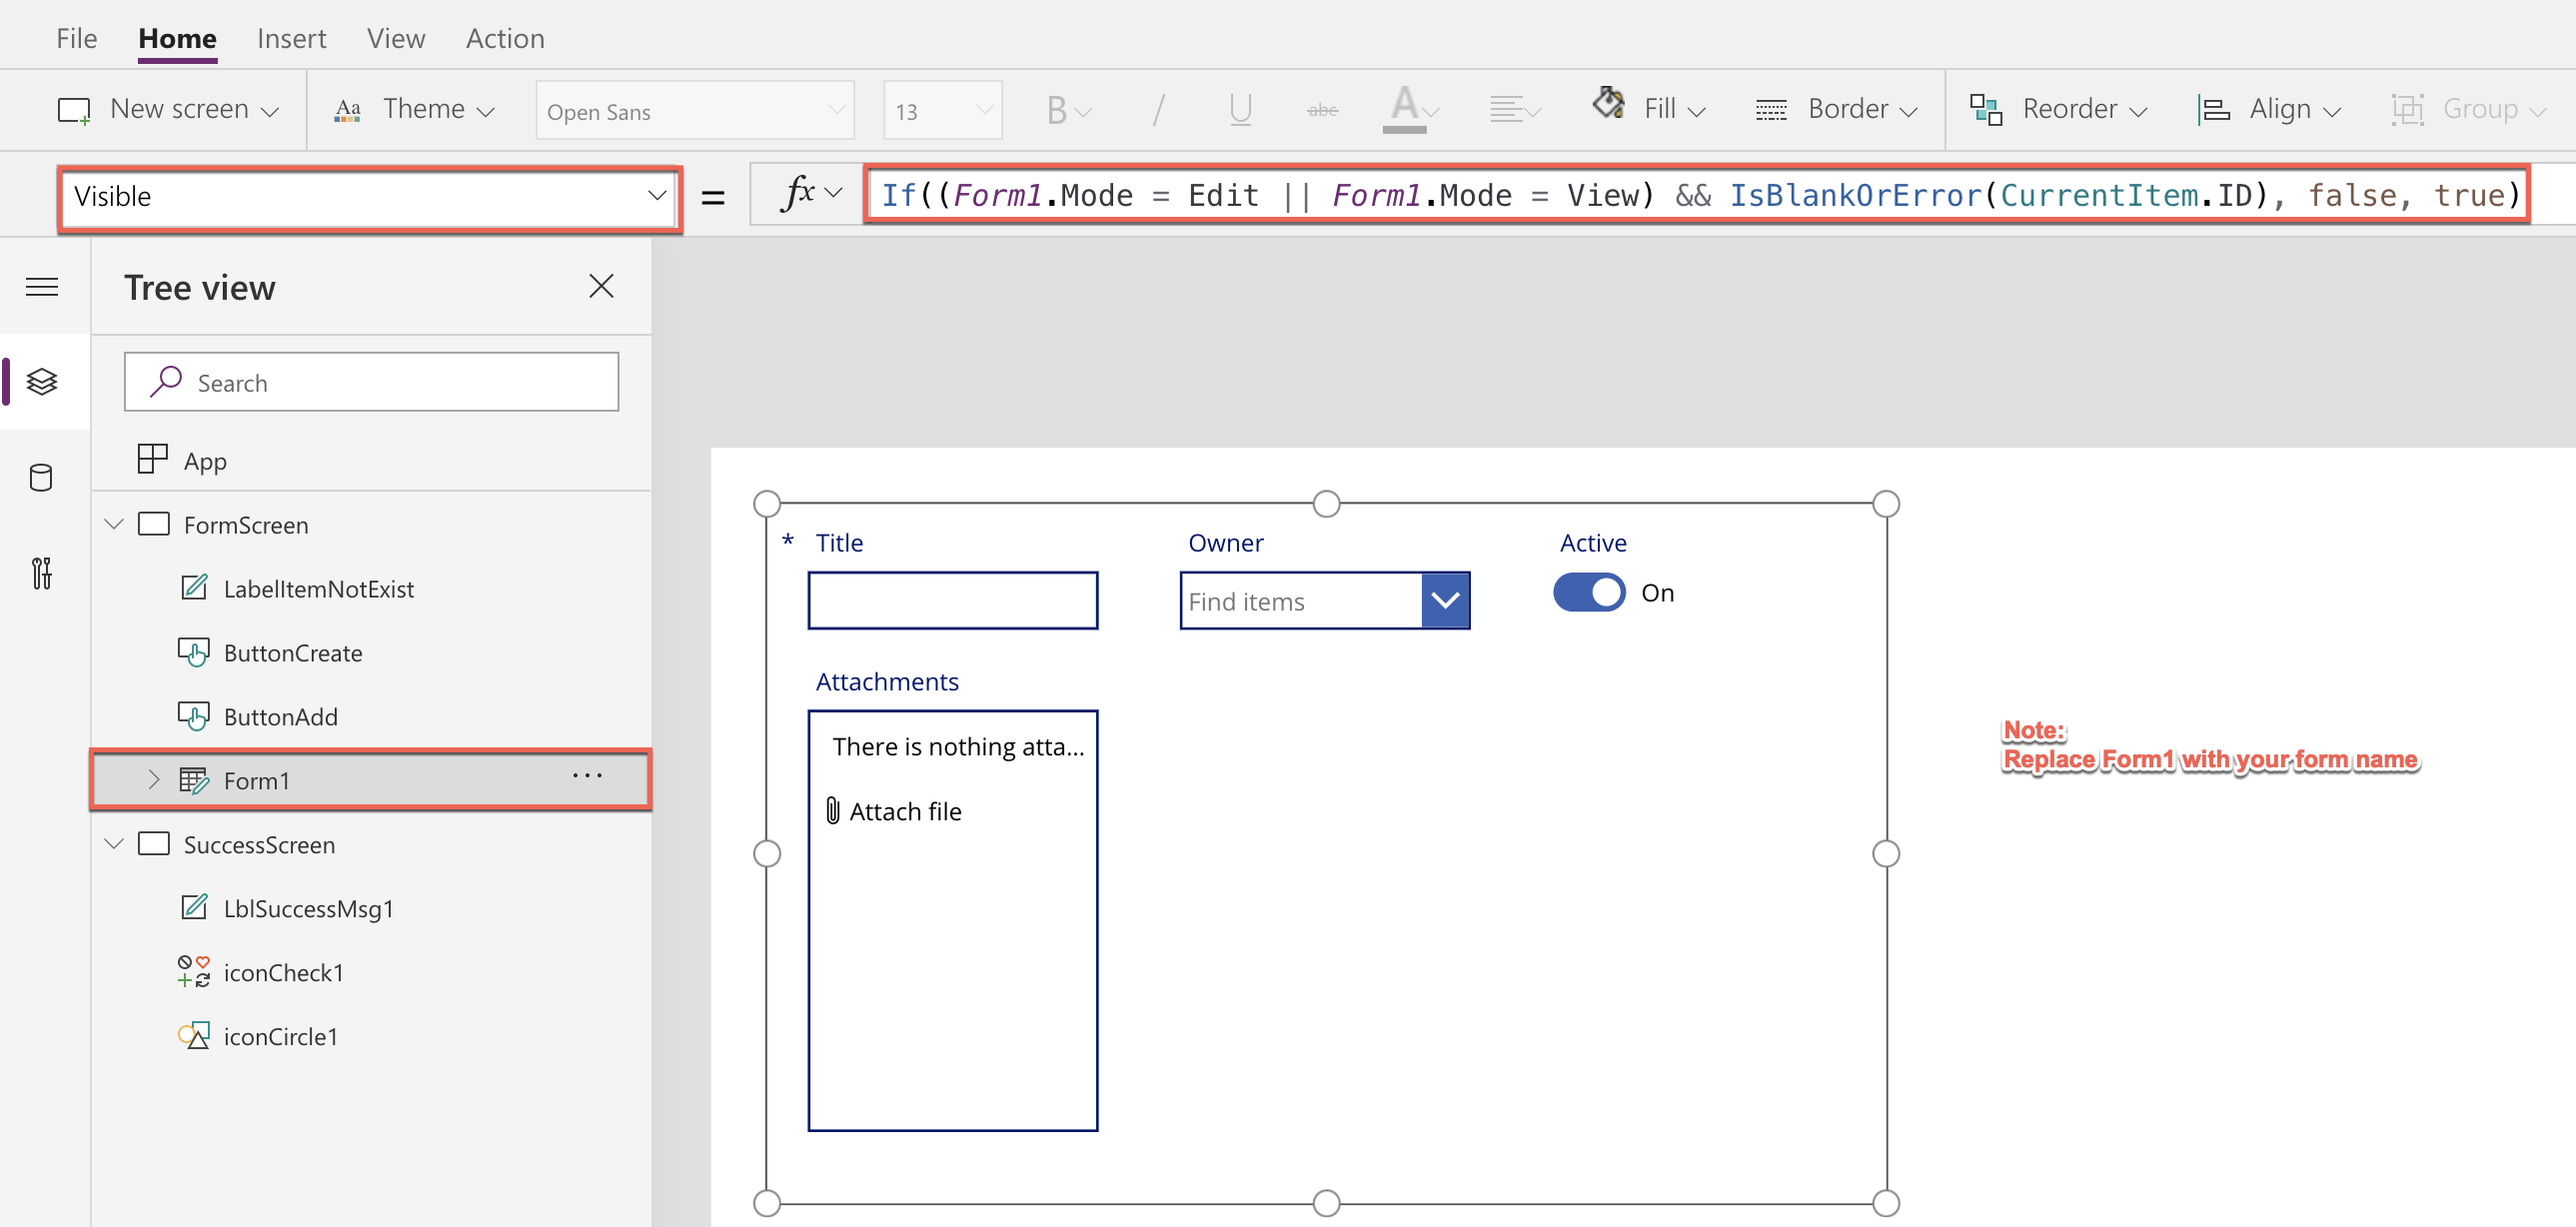
Step – 4
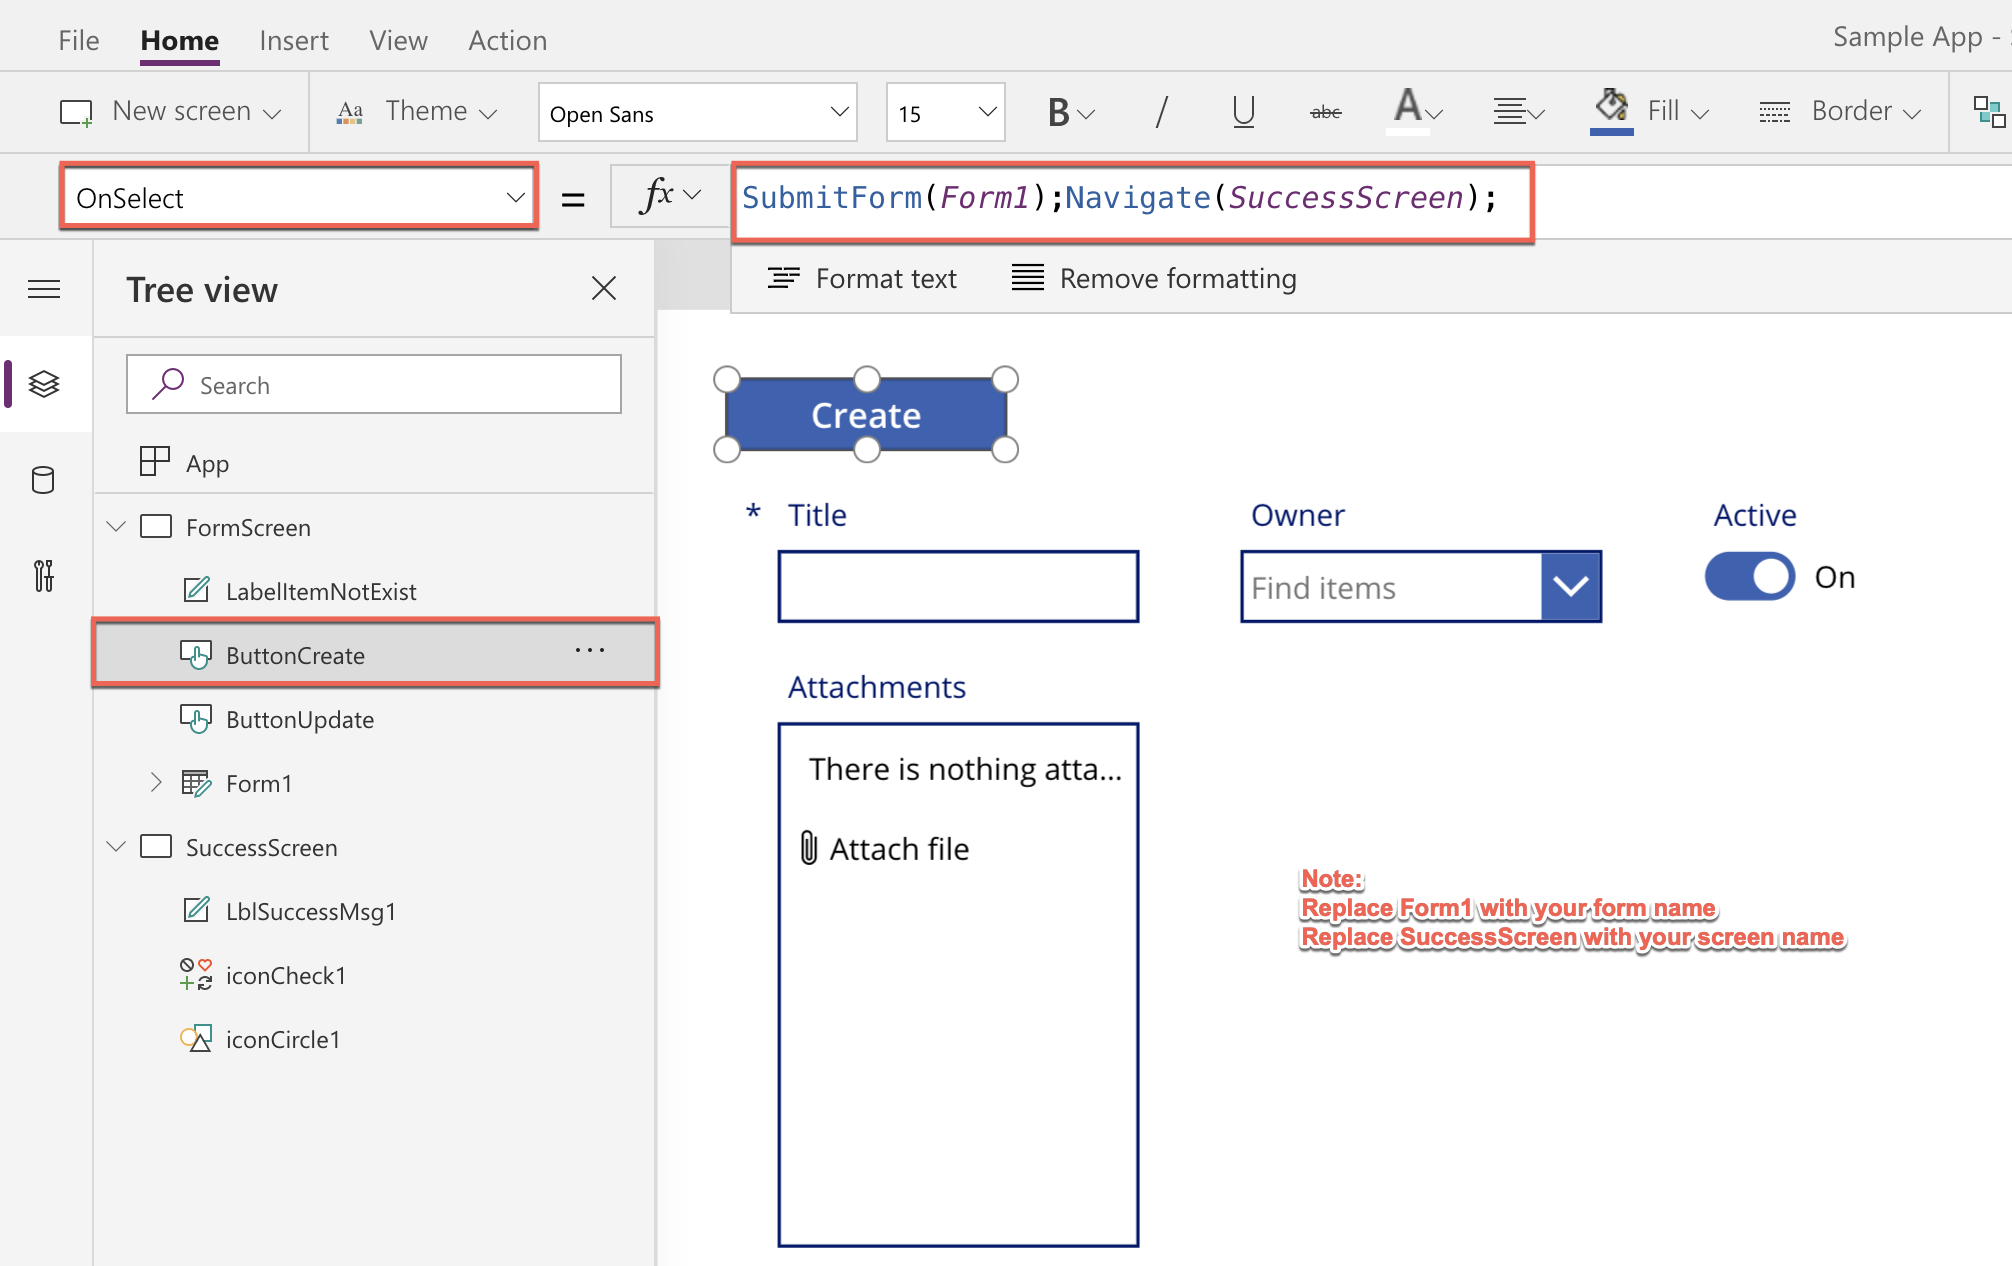
Add a button outside the form control to create a record in SharePoint and change its visibility expression as shown below:
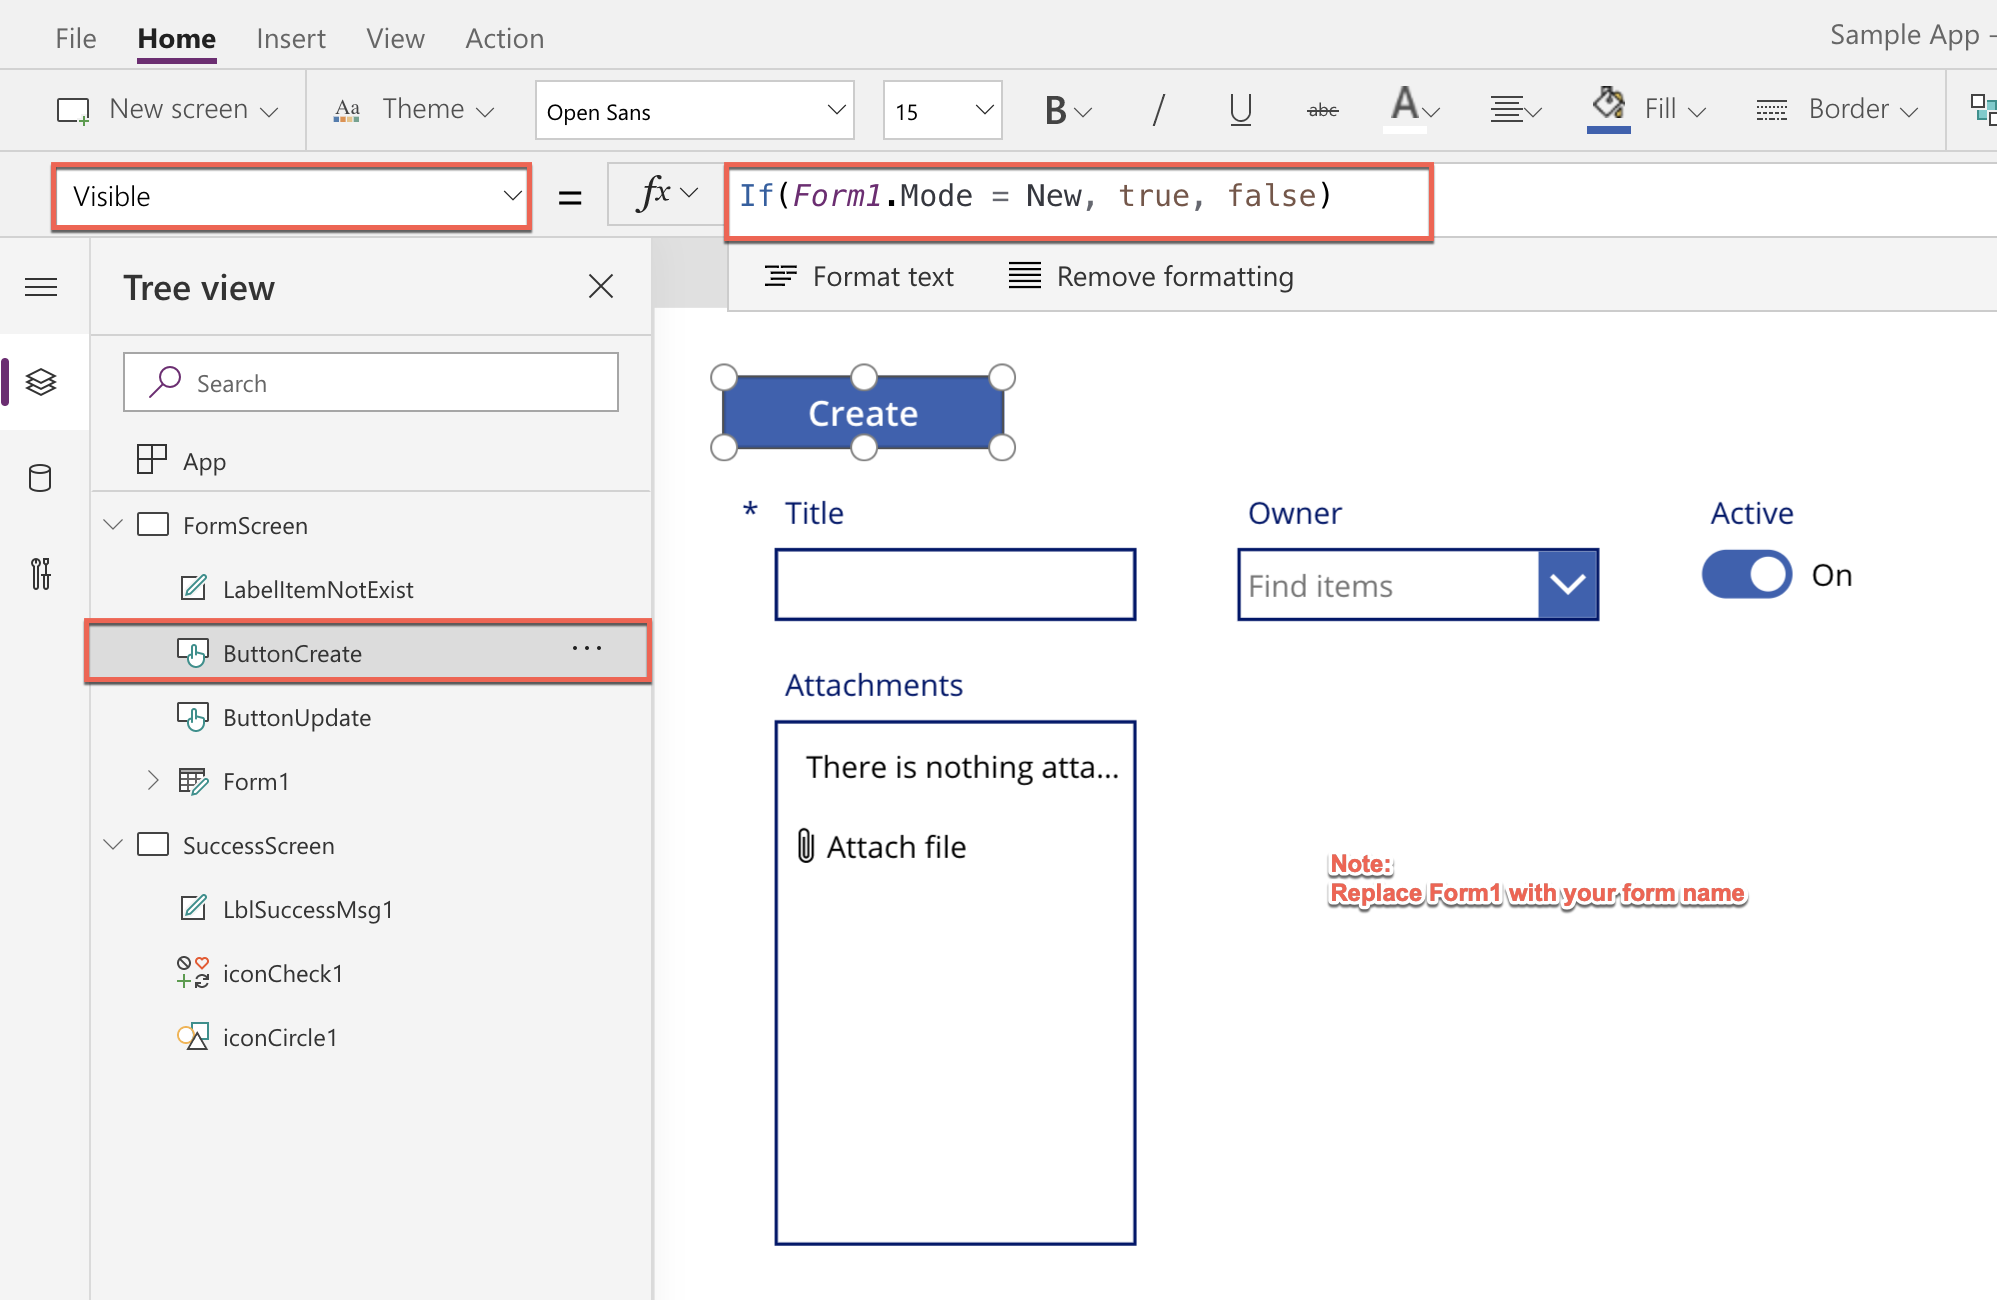
Change the button’s OnSelect property as shown below:
Step – 5
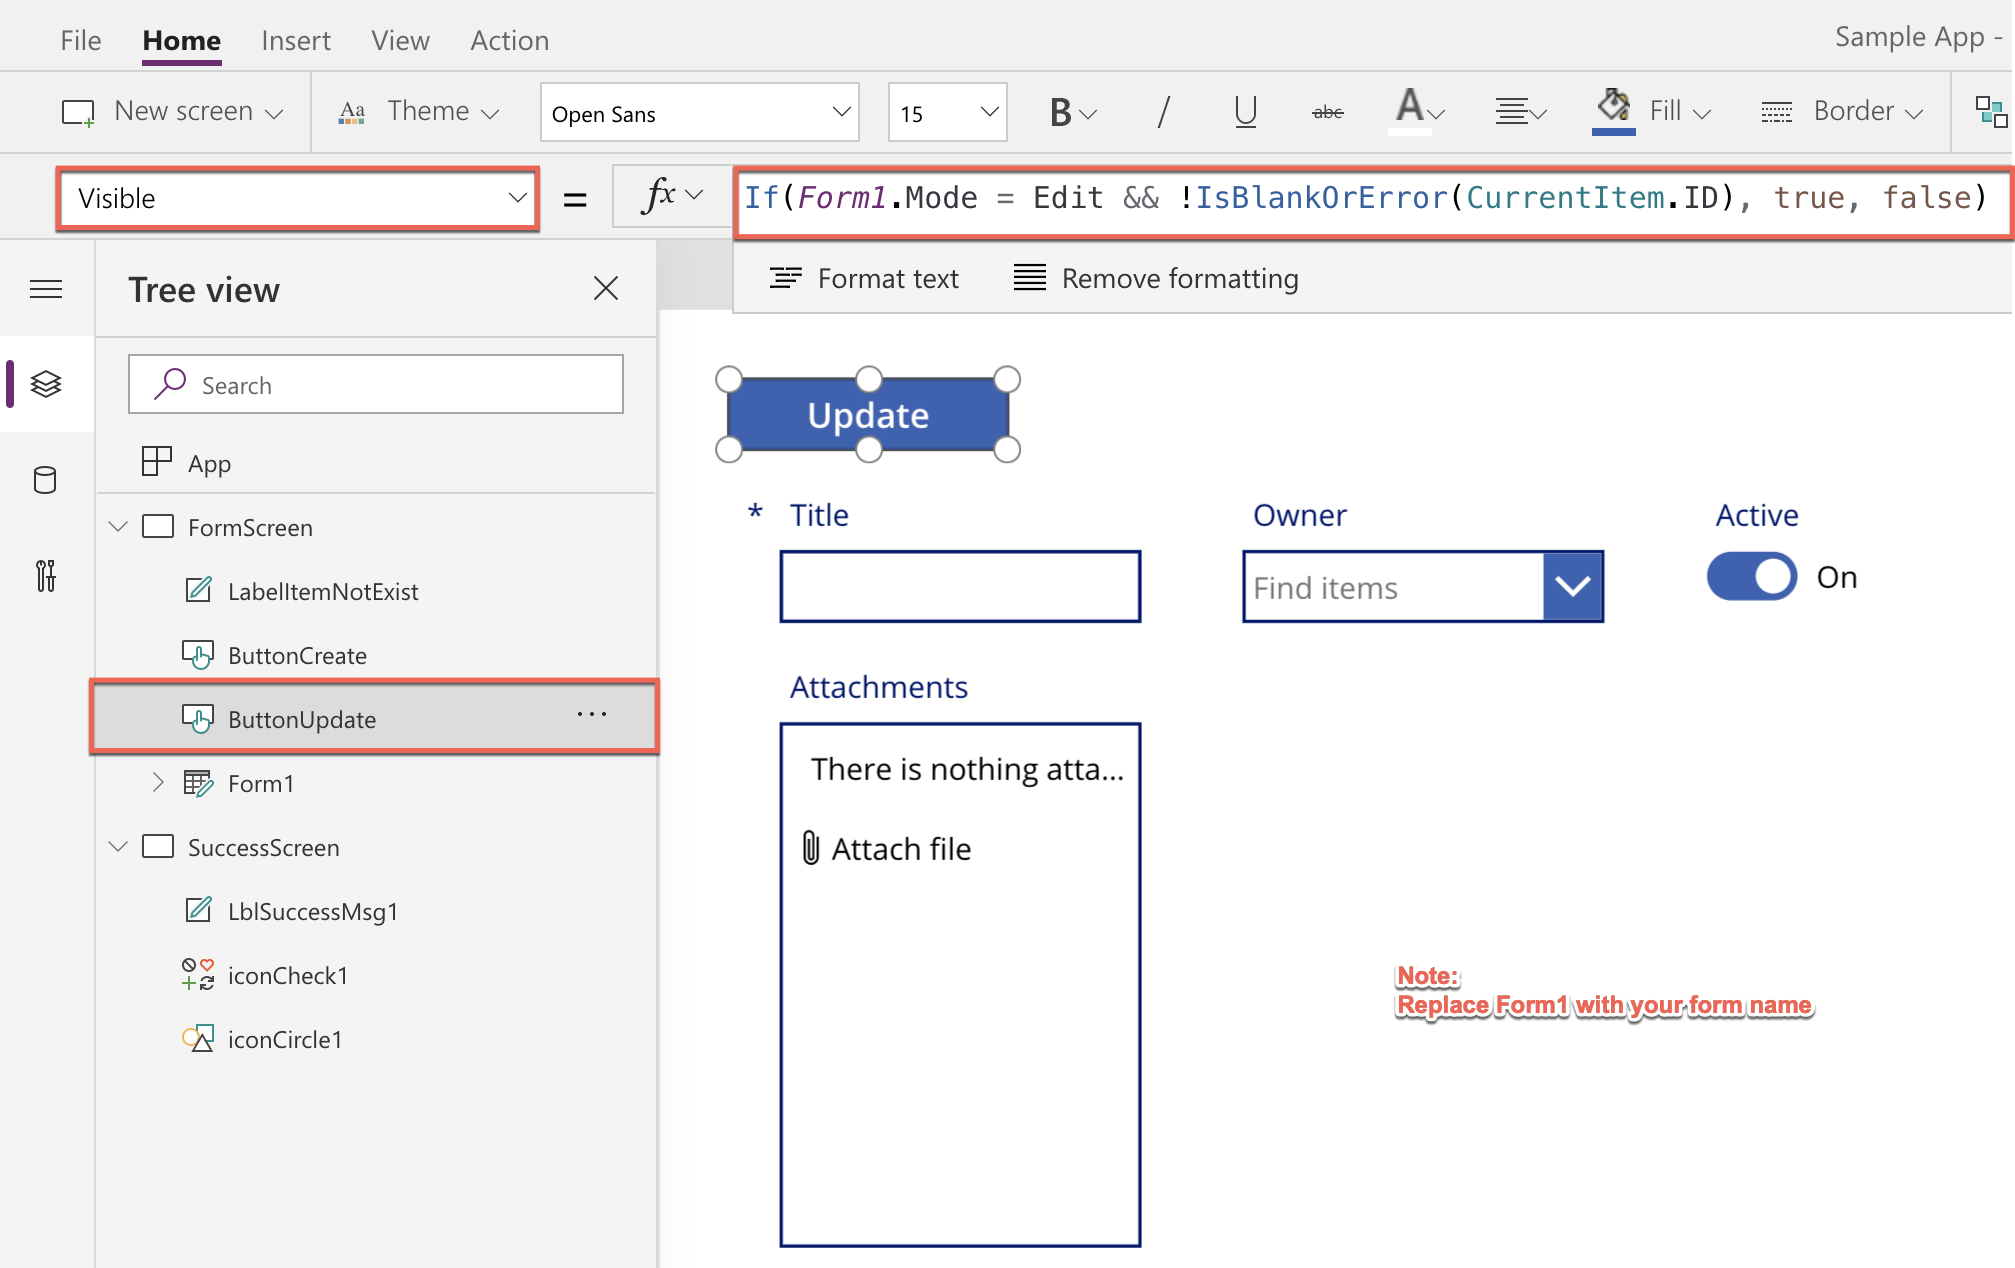
Add a button outside the form control to update an existing record in SharePoint based on ID parameter and change its visibility expression as shown below:
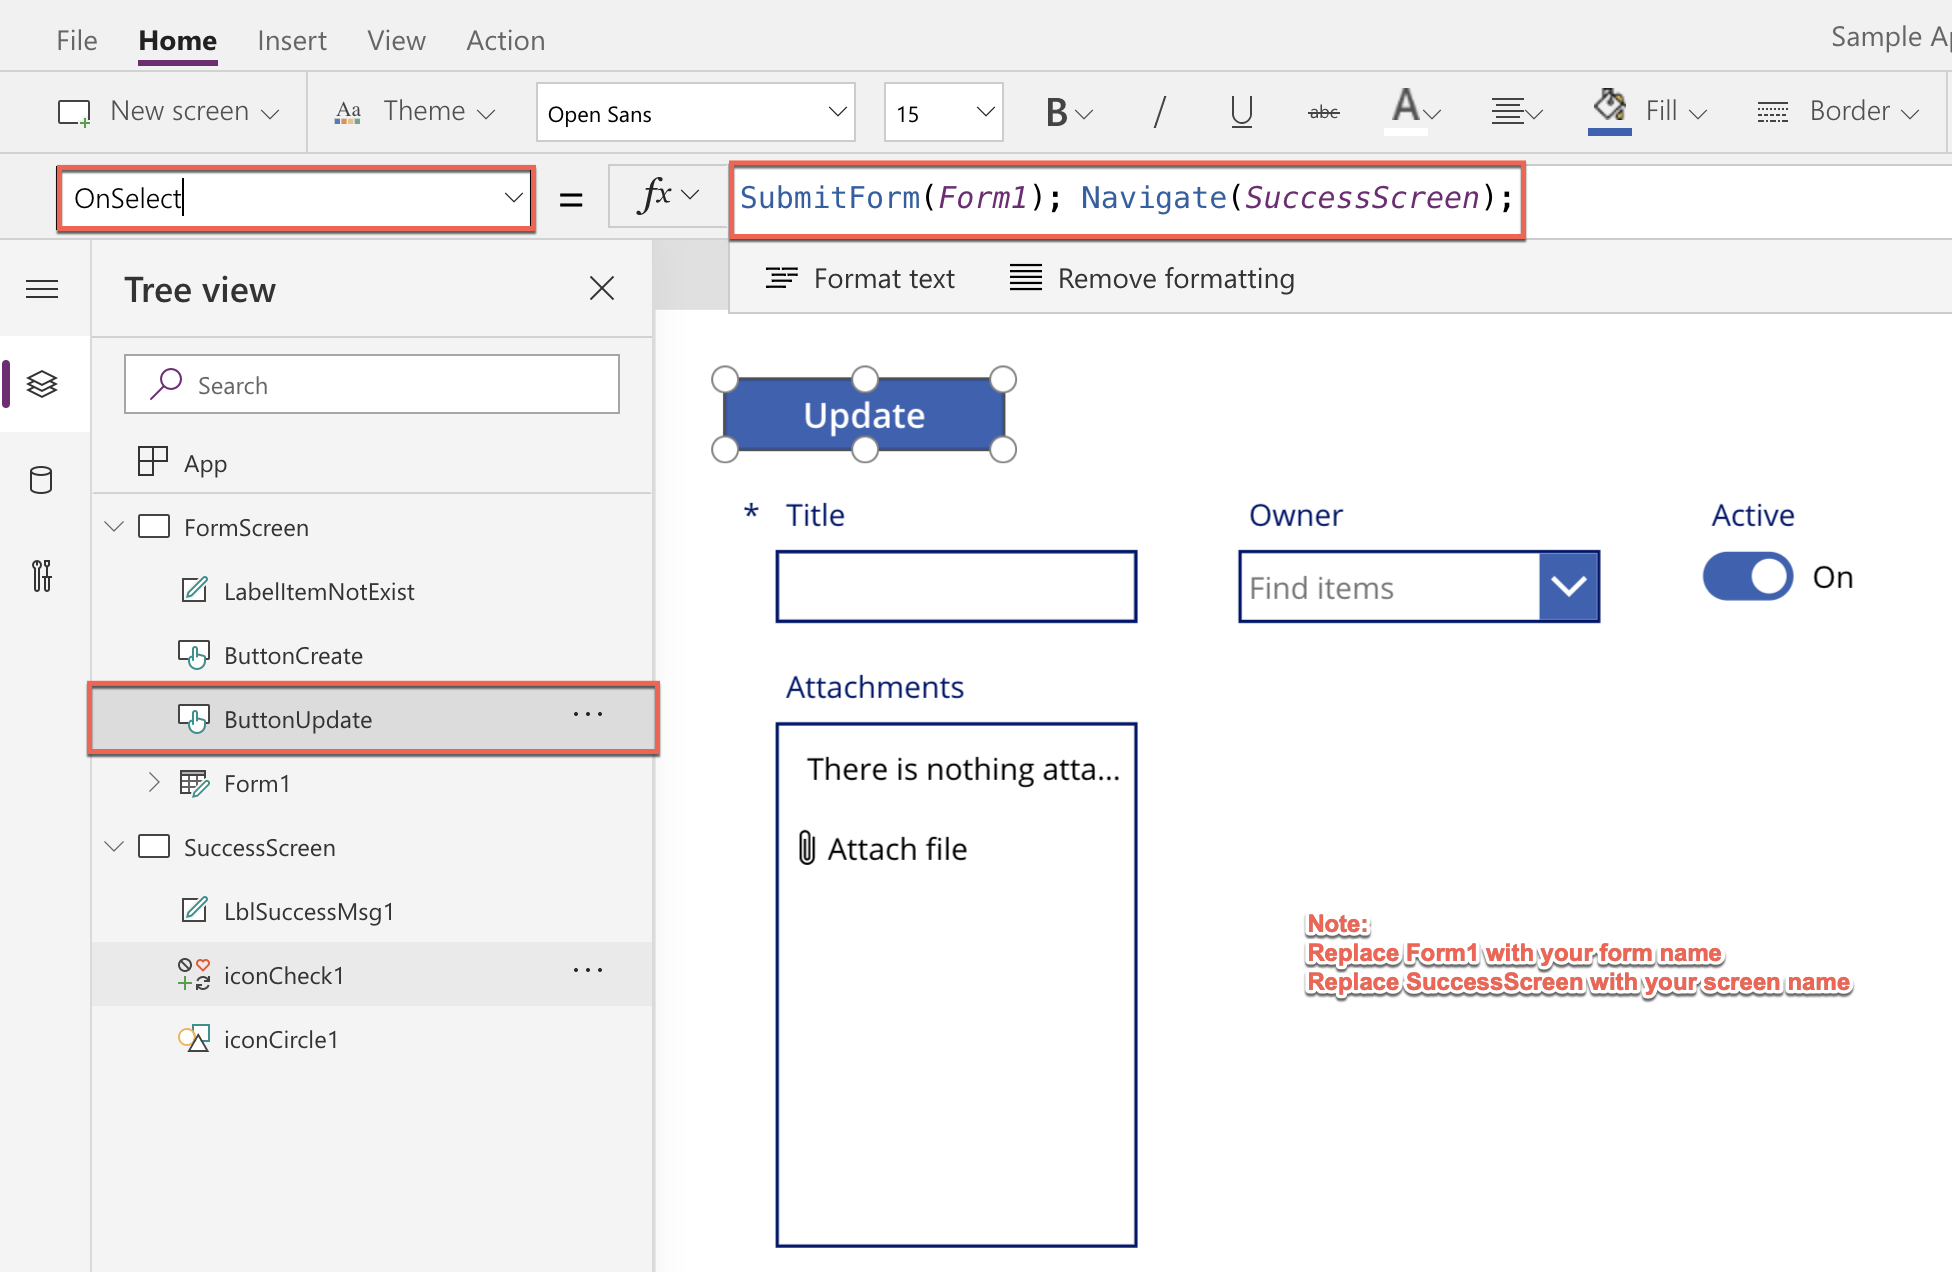
Change the button’s OnSelect property as shown below:
Demo of overall functionalities
I hope you find this article helpful. Contact me if you have any questions.