Have you developed a Slackbot and are looking to deploy it but don’t know how?. Manually deploying this Slackbot code to a single server is a piece of cake. However, deploying the same Slackbot code to multiple servers could become exhausting.
But don’t worry, you’ve come to the right place. This is where Ansible and Jenkins step in.
Ansible automates and streamlines repetitive and complex operations. The fundamental tenet is that you develop “playbooks” to manage your remote servers.
Jenkins enables developers to build, test, and deploy their software reliably. Consider Jenkins a skilled, organized, and competent operations robot. If you teach Jenkins a task, it’ll do it repeatedly. In addition, Jenkins will keep track of everything and notify you if anything goes wrong.
AWS gives reliable, scalable, and secure infrastructure resources ideal for running applications like Jenkins. By running Jenkins on AWS EC2, I only pay for what I use and can scale capacity up or down to match my specific needs.
These tools help save time and effort when deploying applications or configuring a large number of servers.
This post will show how I automated my Slackbot deployment using Ansible and Jenkins. And if you would like to look at the source files for this post, you can find them in this repository.
Prerequisites
You would require the following to follow along with this article and implement the findings.
- Basic understanding of GitHub, Linux, Ansible, Jenkins, AWS EC2, Python, and Slackbot development.
- Linux server that has Jenkins and Ansible configured in it.
- Linux target server to deploy the Slackbot code.
- SSH public key that is added to authorized_keys file in target machines.
- SSH private key file details to log in to target servers from the Jenkins server.
- Slackbot App registered in Socket Mode with the required Event Subscriptions, and OAuth Permissions configured.
- Slackbot Tokens, GitHub Credentials, and AWS EC2 SSH Private Key.
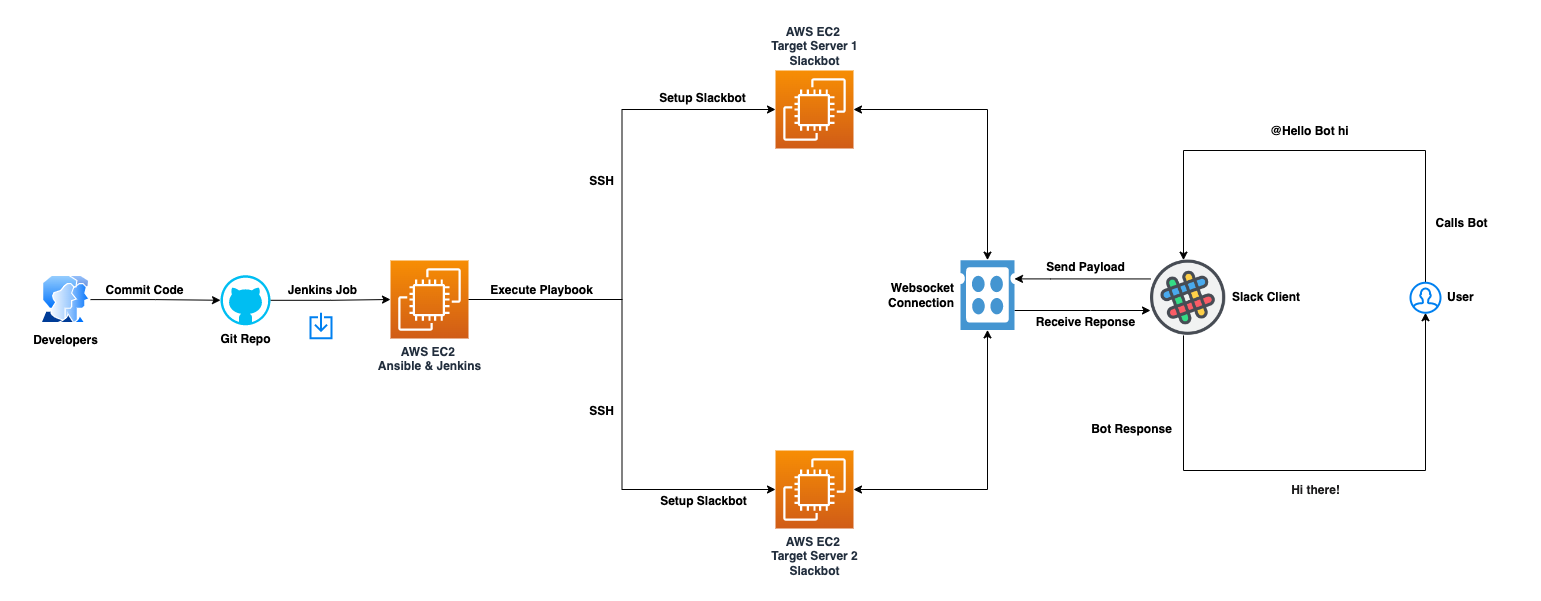
Overall Solution
Diagrams are a powerful tool to showcase solution designs. Here is the solution I used to deploy the Slackbot code to multiple servers.
Code Structure
Structuring a solution’s folders and files is one of the first steps toward starting any development. I kept all the essential features distinct and reusable in this way. Here is my simple folder structure for this post.
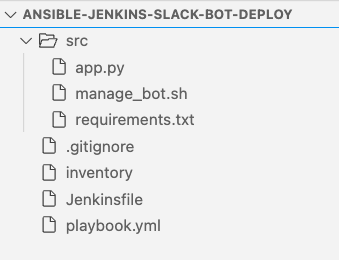
- src folder - This is the source folder where my Slackbot code went in.
- appy.py contains the code to run the Slackbot in Socket Mode using Bolt Framework.
- manage_bot.sh manages the bot.
- requirements.txt contains the dependencies required to deploy and run the Slackbot.
- Inventory used by Ansible to determine the target machines you want to run your playbooks against.
- Jenkinsfile is a text file containing the definition of a Jenkins Pipeline job.
- Playbook.yml in ansible refers to where you define the tasks you want to execute on the target servers. Feel free to move the variables to a separate file.
Jenkins Credentials
You may have a list of credentials, private key files, or strings that you want to be used by a Jenkins job but should not be kept in its SCM or even visible from its configuration file. There are several ways to handle credentials in a declarative Jenkins pipeline. The Jenkins Credentials feature gave me an easy way to store all a job’s secret files and passwords and securely access them during the build. I have created the following credentials to configure the Jenkins job, run the playbook, and set up the bot on target machines.

Configure Jenkins Pipeline
Then comes configuring the Jenkins pipeline. The Jenkins pipeline is a set of related tasks executed in a specific order. Using it, I can create complex or straightforward delivery pipelines as code via the Pipeline domain-specific language syntax. Now that you have understood the basics of Jenkins Pipeline, I will show you how I created the Pipeline to execute the ansible playbook.
- I clicked on New Item from the Jenkins dashboard on the left panel.
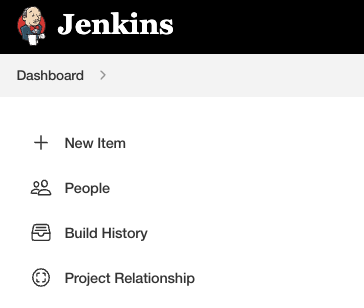
- I chose Pipeline from the list and then entered the name of my pipeline. After that, I clicked OK.

- Then I went to the Pipeline tab, and from the Definition the dropdown, I selected the Pipeline script from SCM and configured the settings as below
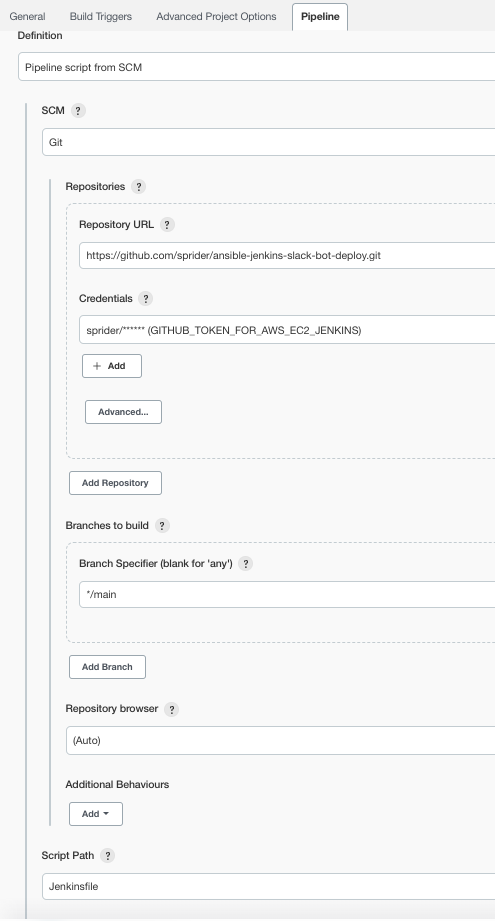
- Lastly, I clicked on Save.
In the previous section, I configured the job, which is now ready to run.
To manually trigger the job, I followed the steps given below
- I went to the Jenkins job I created and clicked on “Build Now”.
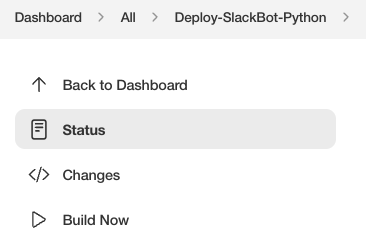
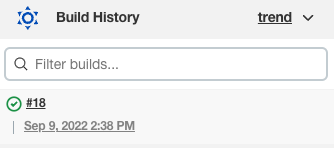
- As soon as I click on the build Now link, the build will start successfully. Here, I can see the execution of the build on the Build history.
- Then I can see the build results on the console output screen. Here is the summary of the tasks I executed using the ansible playbook. Ok tells me the number of tasks that ran successfully; changes show me how many tasks changed the target machine’s state. The rest are self-explanatory, so I will not go into detail.
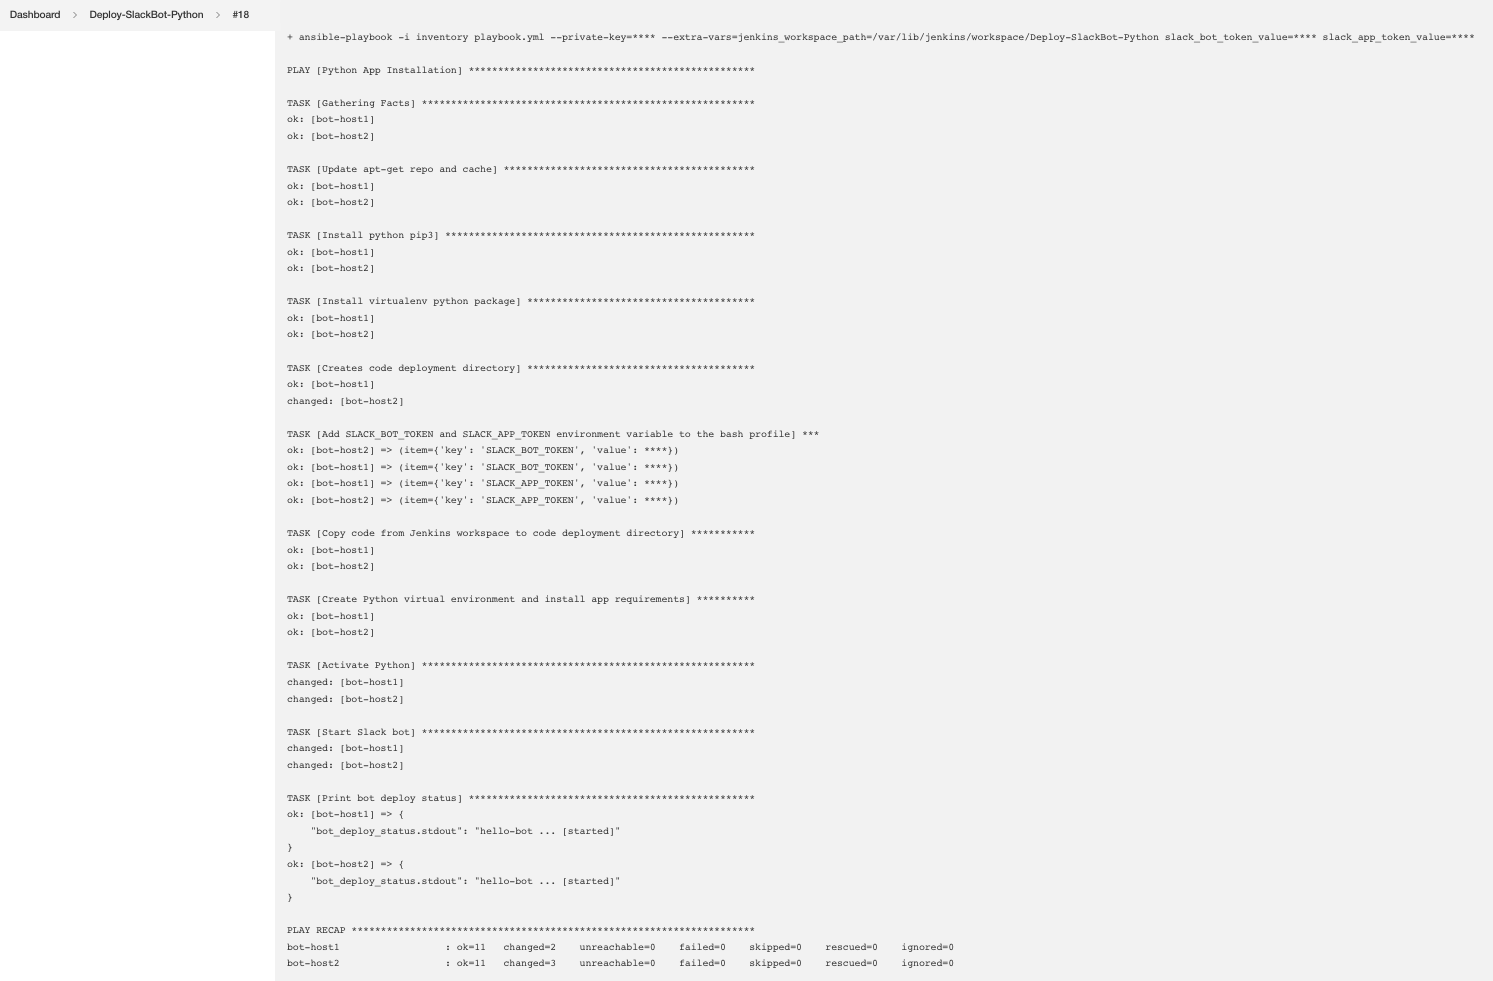
Status of Slackbot Deployment
To verify that my Slackbot has started, I need to login to target machines and execute the following command in my terminal:

Testing Bot Functionality
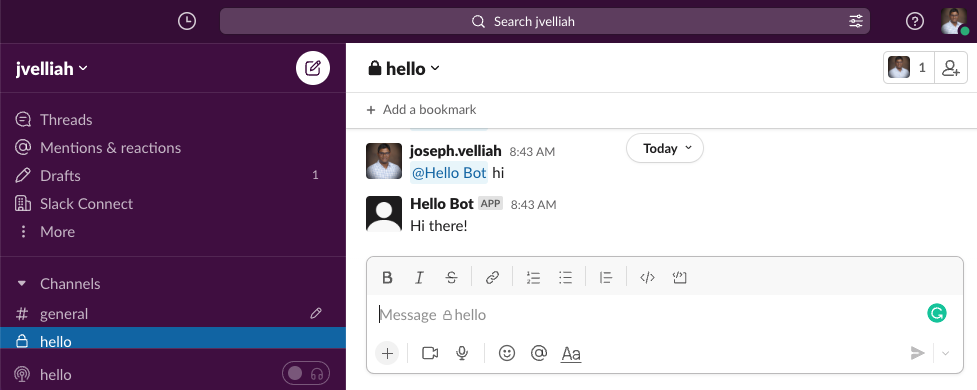
I need to create a new channel in my Slack workspace to test my bot. In the example below, I made a channel called “hello “. By calling “@Hello Bot” in the channel, I added my bot to the brand-new channel. When prompted, I selected Add to Channel from the menu.
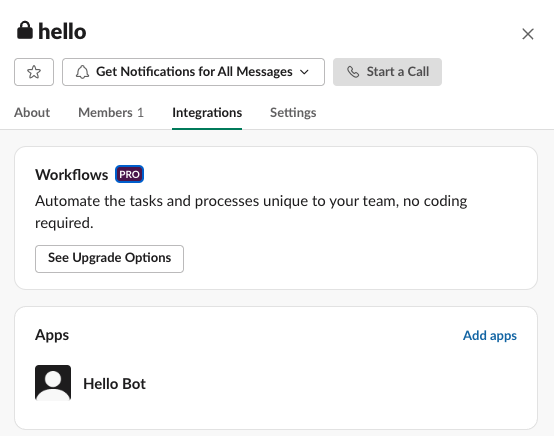
Now, I am ready to test my bot. To test it, I called my bot and sent a message from a Slack client. And voila, I got the response from the bot.
That’s a wrap. I have successfully deployed and tested my Slackbot using Jenkins and Ansible. And you can do it too. But, of course, you can do more with Slackbots than the straightforward “Hi there!” reply. I suggest checking out the Ansible, Jenkins, and Slack API docs if you want to implement best practices or try something challenging.
So, why not try and check it out for yourself?
