Slash Commands allow users to invoke your app by typing a string into the message composer box. A submitted Slash Command will send the data from Slack to the associated app. In whatever way, the app can then respond to the sender using the context provided by that payload. These commands are the entry points for complex workflows, integrations with external services, or simple message responses.
To integrate your AWS Lambda function with Slash Commands, you will have to follow the below steps:
- Create a Lambda function to handle the payload sent from Slack Slash Command.
- Configure Amazon API Gateway to expose the Lambda function you built in the previous step as a RESTful API.
- Create a Slash Command in Slack.
- A user in Slack types in the message box with the command, AWS IAM username, and submits it.
- A payload is sent via an HTTP POST request to Amazon API Gateway RESTful API.
- Your Lambda function retrieves the AWS IAM user details and returns them.
Create a Lambda function
AWS Lambda is a compute service that lets you run code without provisioning or managing servers. Instead, Lambda runs your code only when needed and scales automatically, from a few daily requests to thousands per second.
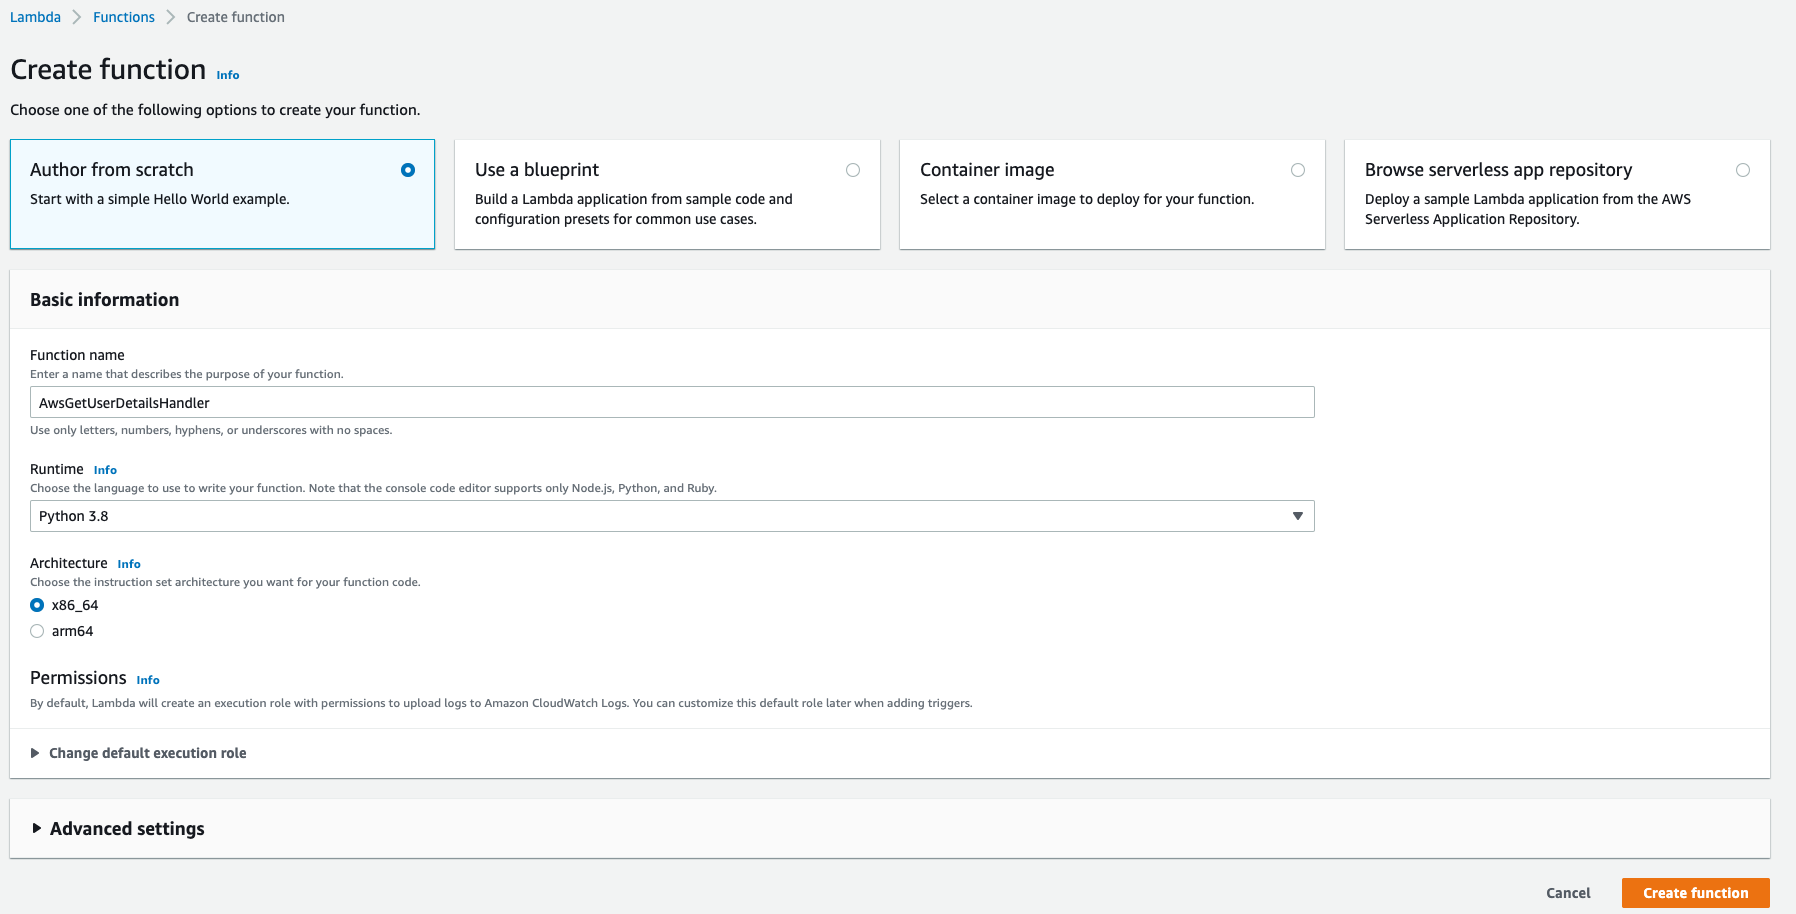
- Sign into the Lambda console at https://console.aws.amazon.com/lambda.
- Choose Create function.
- Select Author from scratch.
- For Function name, enter AwsGetUserDetailsHandler.
- Under Runtime info, select Python 3.8.
- Leave the remaining settings as is.
-
Choose Create function.
Create a RESTful API using Amazon API Gateway
Amazon API Gateway is a fully managed service that makes it easy for developers to publish, maintain, monitor, secure, and operate APIs at any scale. With API Gateway, you can create RESTful APIs using either HTTP or REST APIs.
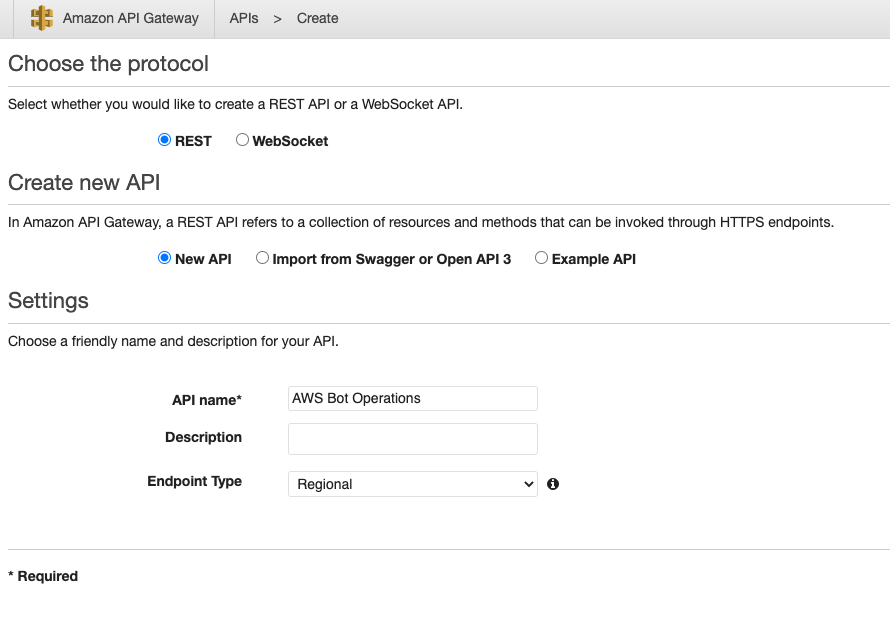
- Sign into the API Gateway console at https://console.aws.amazon.com/apigateway.
- Choose Create API.
- For REST API, choose Build.
- For protocol, select REST.
- For Create new API, select New API.
- For API name, enter AWS Bot Operations.
- Optionally, add a brief description in Description.
- For Endpoint Type, choose Regional.
-
Choose Create.
- To create the API resource, select the root, choose Actions, and then choose Create Resource.
- For Resource Name, enter User Details.
- For Resource Path, enter user-details.
-
Choose Create Resource.

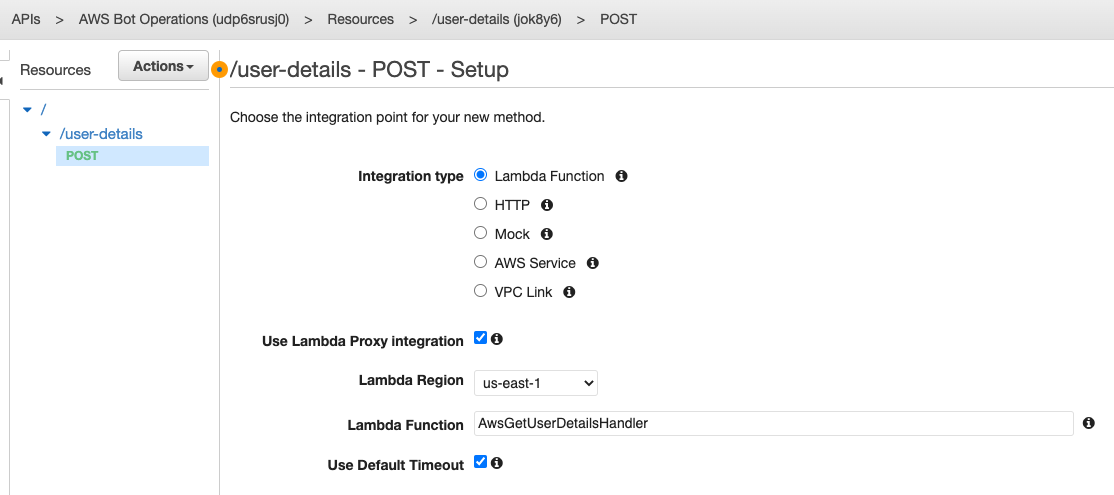
- To expose a POST method on the /user-details resource, choose Actions and then Create Method.
- Choose POST from the list under the /user-details resource node and choose the check mark icon to finish creating the method.
- In the method’s Setup pane, select Lambda Function for Integration type.
- Choose Use Lambda Proxy Integration.
- For Lambda Region, choose us-east-1.
-
Choose Save.
- To deploy the API, select the API and then choose Deploy API from the Actions drop-down menu.
- In the Deploy API dialog, choose a stage (or [New Stage] for the API’s first deployment); enter dev in the Stage name input field; optionally, provide a description in Stage description and/or Deployment description; and then choose Deploy.
-
Once deployed, you can obtain the invocation URLs (Invoke URL) of the API’s endpoints.

Creating a Slash Command
Creating a command is simple; you need two things - a Slack App and the name of your new command. If you don’t already have a Slack App, click this link to create one.
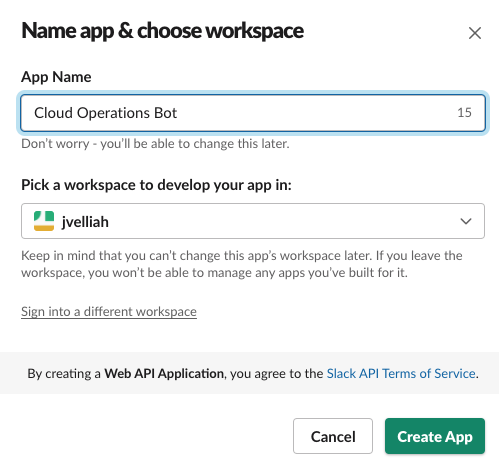
Now let’s get to creating that command. First, head to your app’s management dashboard and click the Slash Commands feature in the navigation menu.
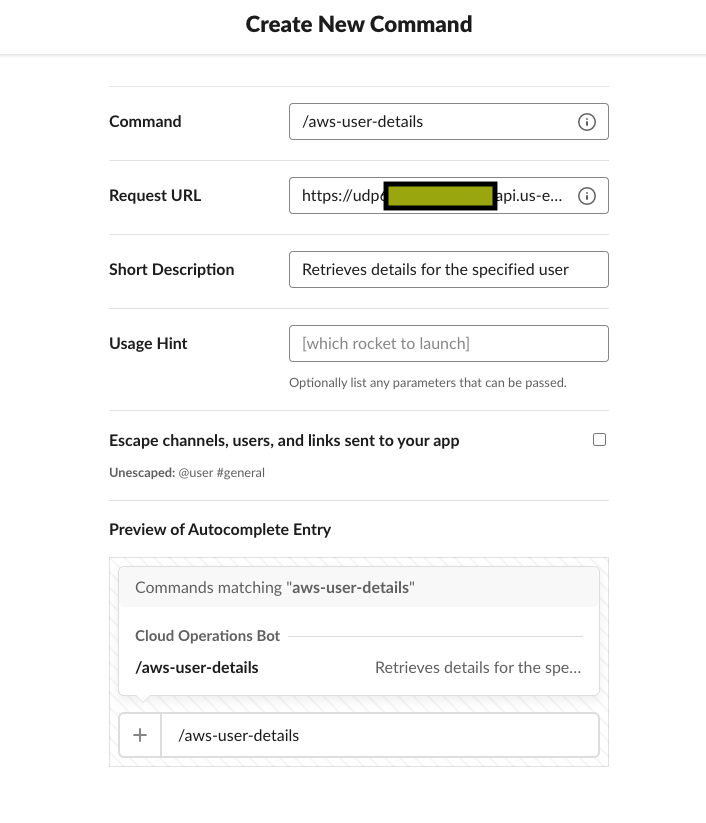
You will be presented with a button marked Create New Command, and when you click on it, you will see a screen where you will be asked to define your new Slash Command:
- For Command, enter /aws-user-details.
- For Request URL, enter the Invoke URL of the POST method we created in the previous step.
- Optionally, add a brief description in Short Description.
-
To save the command details, click Save.
-
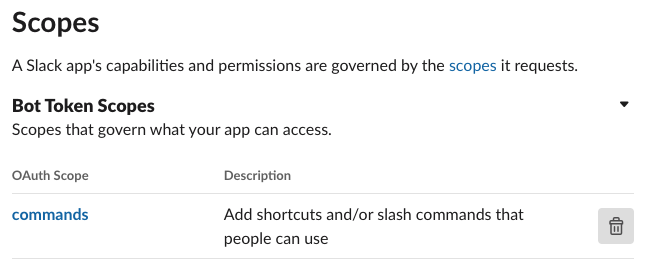
A Slack app’s capabilities and permissions are governed by the scopes it requests. Go to your app’s management dashboard, and then click the OAuth & Permissions feature in the navigation menu.
-
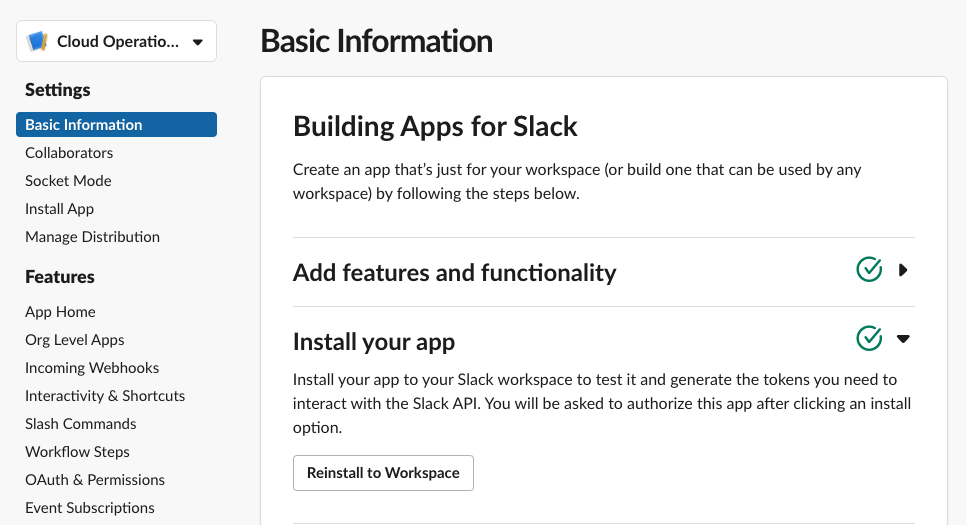
Install your app to your Slack workspace to test it. You will be asked to authorize this app after clicking an install option.
Update Lambda Function Code and Settings
- Open the Functions page of the Lambda console.
- Choose your function.
- Scroll down to the console’s Code source editor Open lambda_function.py, and replace its contents with the following code:
import os
import json
import urllib.parse
import hmac
import hashlib
import boto3
from botocore.exceptions import ClientError


def lambda_handler(event, context):

    try:
        is_request_from_slack = check_if_request_from_slack(event)

        if is_request_from_slack == False:
            return send_failure_reason("Request not from Slack")

        command_input = extract_command_input(event)

        if not command_input:
            return send_failure_reason(
                "Send an aws username with the command to get user details. It is neither empty nor blank in the command input.")

        user = get_user(command_input)
        return send_success_response(user)

    except ClientError as error:
        print(error)
        return send_failure_reason(error.response['Error']['Message'])
    except Exception as e:
        print(e)
        return send_failure_reason(
            "Unable to process your request at this time. please try again later or contact the admin.")

# Send success response to the Slack user


def send_success_response(user):
    return {
        'statusCode': 200,
        'body': json.dumps({
            "response_type": "in_channel",
            "blocks": [
                {
                    "type": "section",
                    "text": {
                        "type": "mrkdwn",
                        "text": f"Here is the details about aws user *{user.user_name}*"
                    }
                },
                {
                    "type": "section",
                    "text": {
                        "type": "mrkdwn",
                        "text": f"ARN - {user.arn}"
                    }
                },
                {
                    "type": "section",
                    "text": {
                        "type": "mrkdwn",
                        "text": f"Account Created Date - {user.create_date}"
                    }
                }
            ]
        }),
        'headers': {
            'Content-Type': 'application/json'
        }
    }

# Send failure reason to the Slack user


def send_failure_reason(message):
    return {
        'statusCode': 200,
        'body': json.dumps(
            {
                "response_type": "in_channel",
                "text": message
            }
        ),
        'headers': {
            'Content-Type': 'application/json'
        }
    }

# Parse out command input from the posted message


def extract_command_input(event):
    body = event['body']
    command = body.split("text=")[1]
    command_input = urllib.parse.unquote(command.split("&")[0])
    return command_input.strip()

# Get AWS IAM user details with boto3


def get_user(username):
    try:
        iam = boto3.resource('iam')
        user = iam.User(username)
        return user
    except ClientError as boto3ClientError:
        raise boto3ClientError

# Verify the request is from Slack


def check_if_request_from_slack(event):
    body = event['body']
    timestamp = event['headers']['X-Slack-Request-Timestamp']
    slack_signature = event['headers']['X-Slack-Signature']
    slack_signature_basestring = "v0:" + timestamp + ":" + body
    slack_signature_hash = "v0=" + hmac.new(os.environ['SLACK_SIGNING_SECRET'].encode(
        'utf-8'), slack_signature_basestring.encode('utf-8'), hashlib.sha256).hexdigest()

    if not hmac.compare_digest(slack_signature_hash, slack_signature):
        return False
    else:
        return True
- The Lambda function code does the following:
- Parses out aws IAM username from the posted command.
- Gets AWS IAM user details with boto3.
- Returns the AWS IAM user details back to the user who sent the command.
- Choose Configuration, then choose Environment variables.
- Under Environment variables, choose Edit.
- Choose Add environment variable.
- Enter the following key and value:
- Slack creates a unique string for your app and shares it with you. Verify requests from Slack with confidence by verifying signatures using your signing secret.
- Head to your Slack app’s management dashboard, and then click the Basic Information feature in the navigation menu.
- Copy the Signing Secret value from App Credentials section.
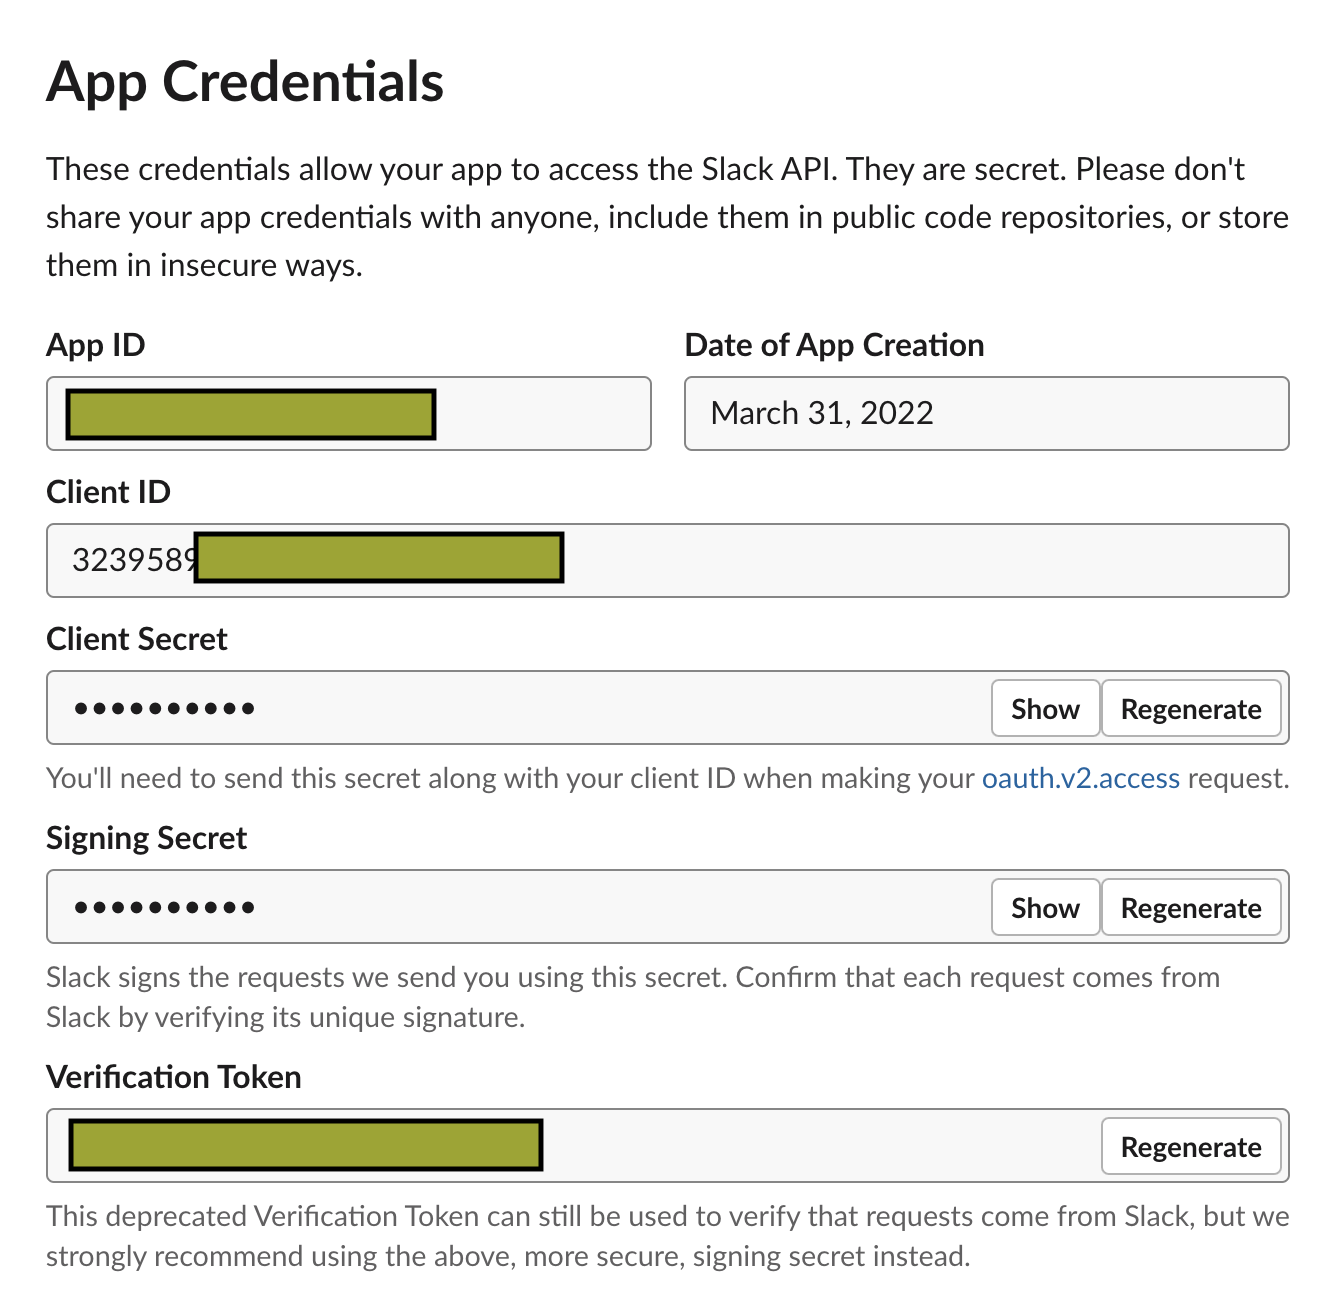
- Paste the copied Signing Secret value in the Value column of SLACK_SIGNING_SECRET key.

- Choose Save.
-
Choose Permission, then click on Execution role name.
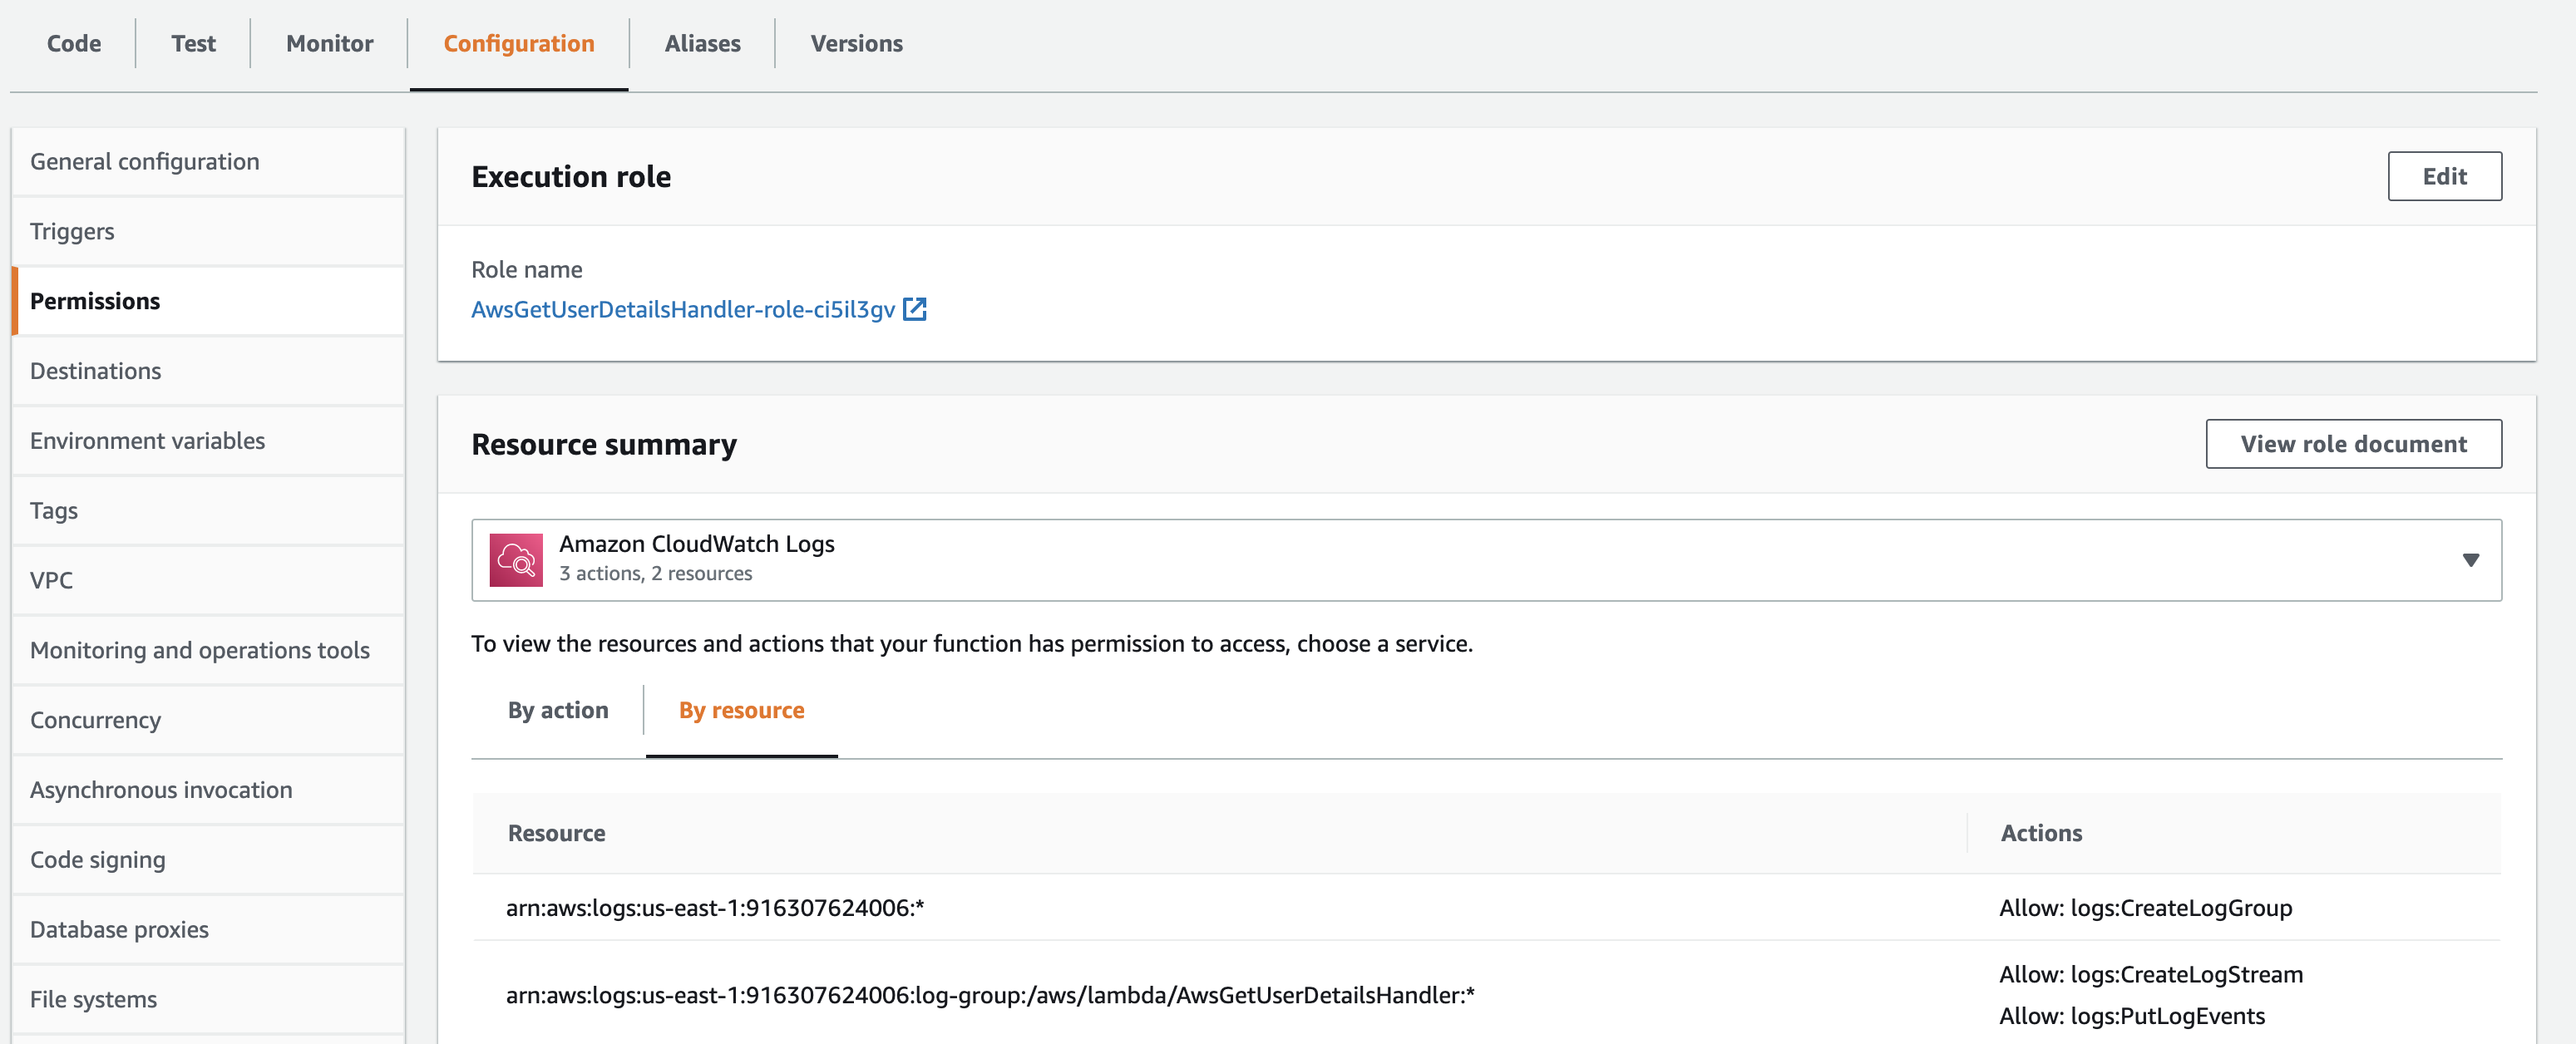
-
Add IAMReadOnlyAccess AWS managed policy so that your Lambda function can get the IAM user details requested by the user using slash command.
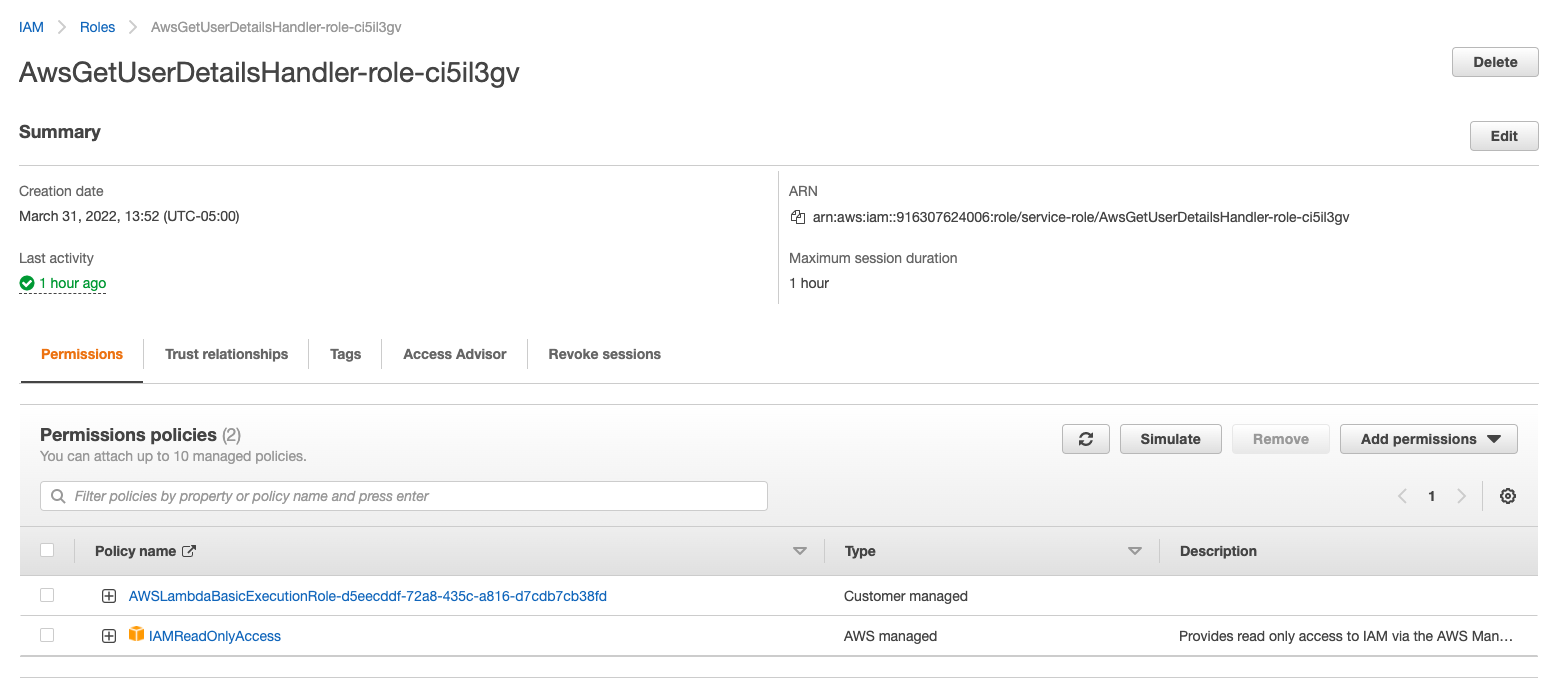
-
To deploy the Lambda function, press the Deploy button from the code editor panel.

Testing your new command
Go to a channel or the DM message window in Slack and enter the new Slash command into the message input field with the AWS IAM username and hit enter. I hope you got the expected response from Lambda. You have successfully deployed a custom slash command if the answer is yes.
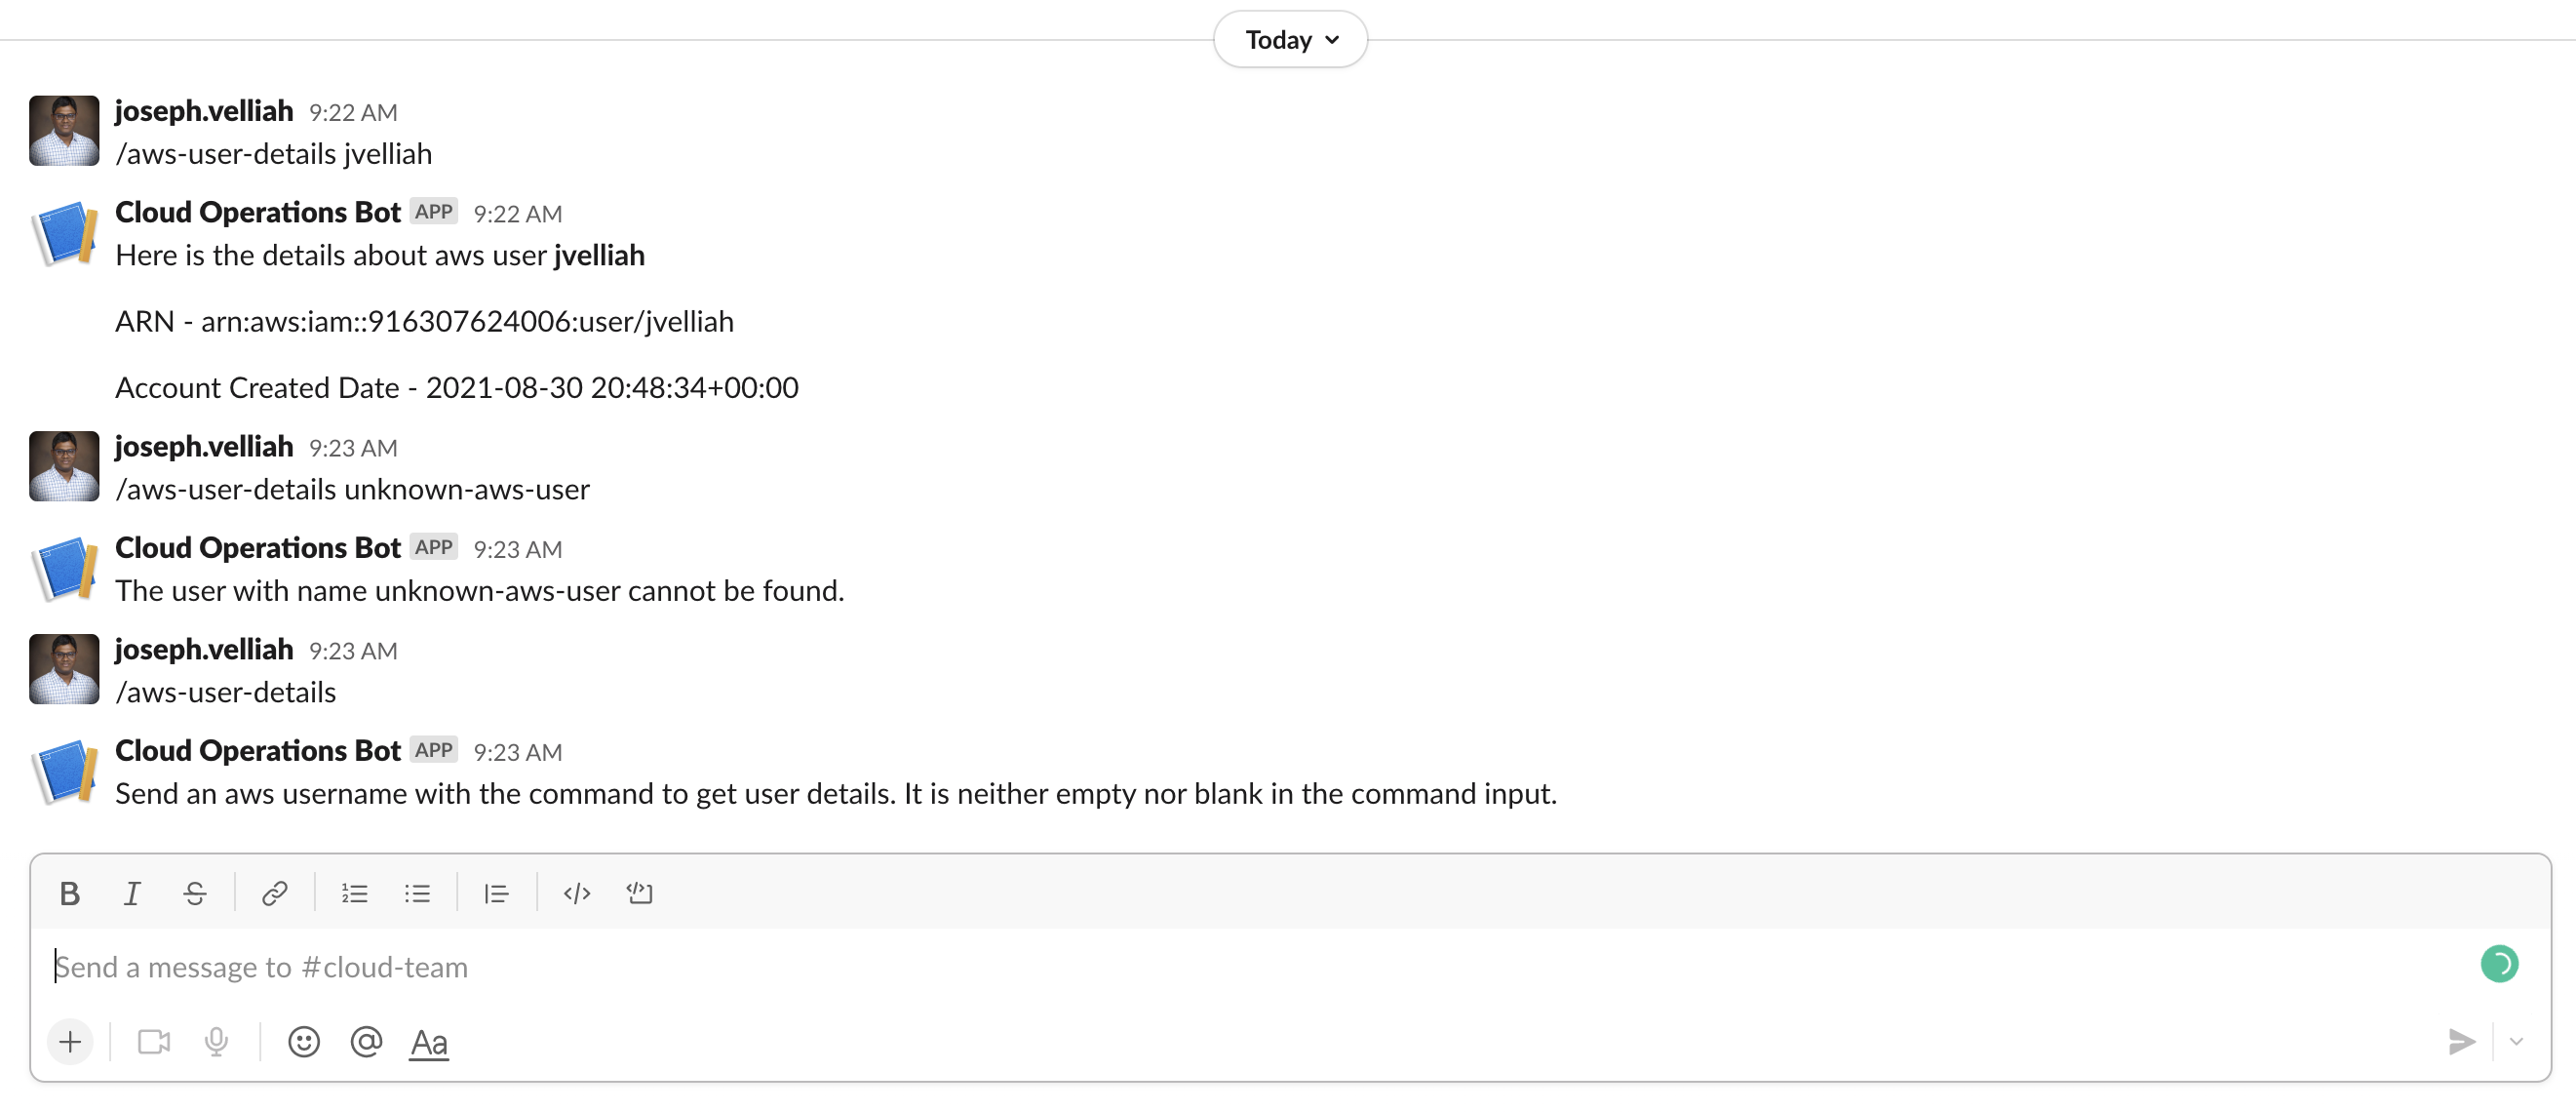
You can add more commands to automate your IT needs and make Slack even more valuable(e.g., use case: To log off a hung Citrix session and more).
