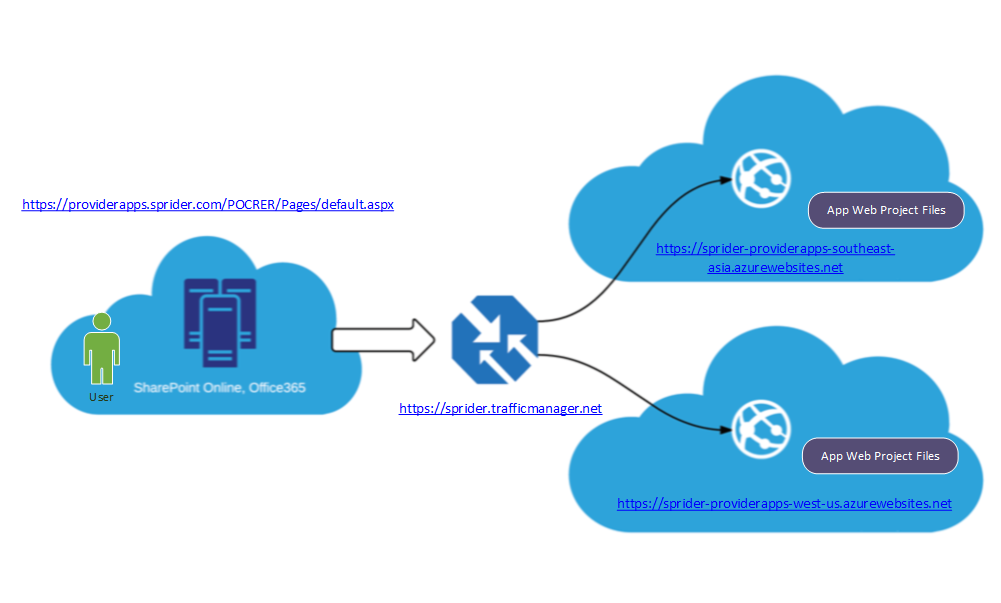
Microsoft Azure Traffic Manager allows us to control the distribution of user traffic to the specified endpoints (Zone Specific Azure Sites).
Azure Traffic Manager gives us three traffic routing methods to choose from:
- Failover
- Performance
- Round robin.
We can choose the one that is right for our application or scenario.
Advantages
- Traffic Manager can improve the availability of important applications by monitoring our Azure sites and automatically directing users to a new location anytime there is a failure.
- Traffic Manager makes applications more responsive and improves content delivery times by directing users to an Azure or external location with the lowest network latency.
- Traffic Manager can direct user traffic to distribute it across multiple locations
Steps to load balance provider hosted apps
- Create Azure websites in different zones
- Create a Traffic Manager profile
- Configure End Points (Zone Specific Azure Sites)
- Point the company Internet domain(https://providerapps.sprider.com) to a Azure Traffic Manager domain(https://sprider.trafficmanager.net)
- Publish the web deploy packages separately in each azure website. We need to do this two times, one for each azure website data center location.
- The azure website virtual directory is accessible using the TM URL (https://providerapps.sprider.com). So while registering the app we must give the TM URL for the following parameters
- App Domain: providerapps.sprider.com
- Redirect URI: https://providerapps.sprider.com/POCRER/Pages/default.aspx

Reference
https://azure.microsoft.com/en-us/documentation/articles/traffic-manager-manage-profiles/
