GitHub is a platform where millions of developers and companies build, ship, and maintain their software on GitHub. It is the largest and most advanced development platform in the world. GitHub Actions makes it easy to automate all our software workflows, with world-class CI/CD to build, test, and deploy our code right from GitHub.
In this article, you will learn how to deploy an Azure Function App using GitHub Actions.
Prerequisites
- An Azure subscription. You can get one now with $200 free credit using this link.
- Azure CLI was installed and configured on the local machine. Check this documentation for how to install and configure Azure CLI.
- A GitHub account to setup code repository
- A basic understanding of Azure, Azure CLI, GitHub, Azure Function App, ARM Templates.
Create Azure Resource Group
The first step of using Microsoft Azure is creating a resource group. A resource group is a container that holds related resources for an Azure solution. The resource group can include all the resources for the solution or only those resources that you want to manage as a group.
- Sign into the Azure portal
- Select Resource groups
- Select Add
- Enter the following values:
- Subscription: Select your Azure subscription
- Resource group: articledemofunctionrg
- Region: East US 2
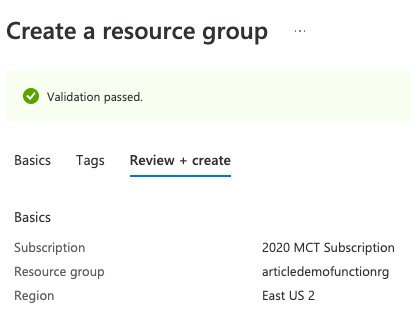
- Enter the following values:
Create Service Principal
The next step is to create a service principal and configure its access to Azure resources. The Azure Command-Line Interface (CLI) is a cross-platform command-line tool connecting to Azure and executing administrative commands on Azure resources. It allows the execution of commands through a terminal using interactive command-line prompts or a script.
- Open Azure CLI locally
- Create a new service principal in the Azure portal for your app. The service principal must be assigned the Contributor role.
az ad sp create-for-rbac --name AZ-Cred-For-Github_Actions --role contributor --scopes /subscriptions/73287868-546c-4998-b725-fab8ba68841e/resourceGroups/articledemofunctionrg --sdk-auth

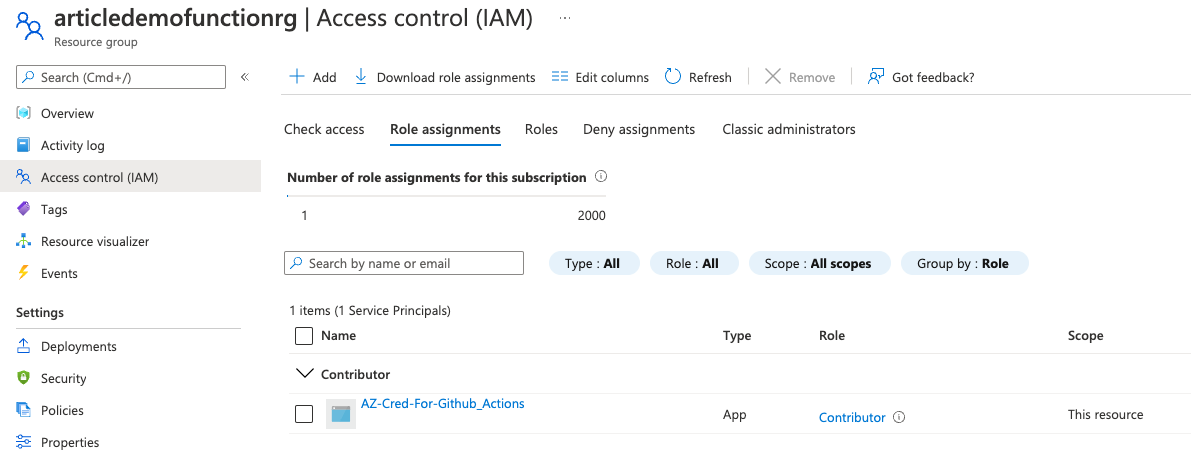
- Record the JSON output to use in the next step.
Create a GitHub Repository
To put your code up on GitHub, you will need to create a repository for it to live in.
- In the upper-right corner of any GitHub page, use the drop-down menu, and select new repository.
- Type a name for your repository. For example, “github-actions-on-azure-demo “.
- Optionally, add a description of your repository.
- Choose a repository visibility.
- Select Initialize this repository with a README.
- Click Create repository.
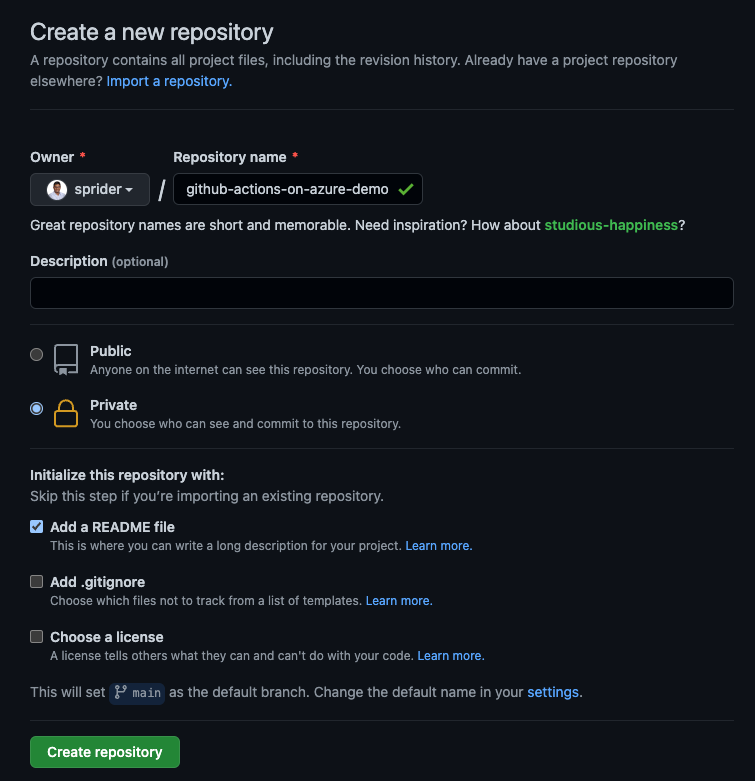
- You successfully created your first repository and initialized it with a README file.
Add Service Principal as a GitHub secret
Sensitive values should never be stored as plaintext in workflow files/code but rather as secrets. Secrets can be configured at the GitHub repository level. For example, you will save the Service Principal in the GitHub Secrets configuration.
- Open your GitHub repository and go to Settings.
- Select Secrets and then Actions.
- Click on New repository secret.
- Paste in your JSON object for your service principal with the name AZURE_CREDENTIALS.
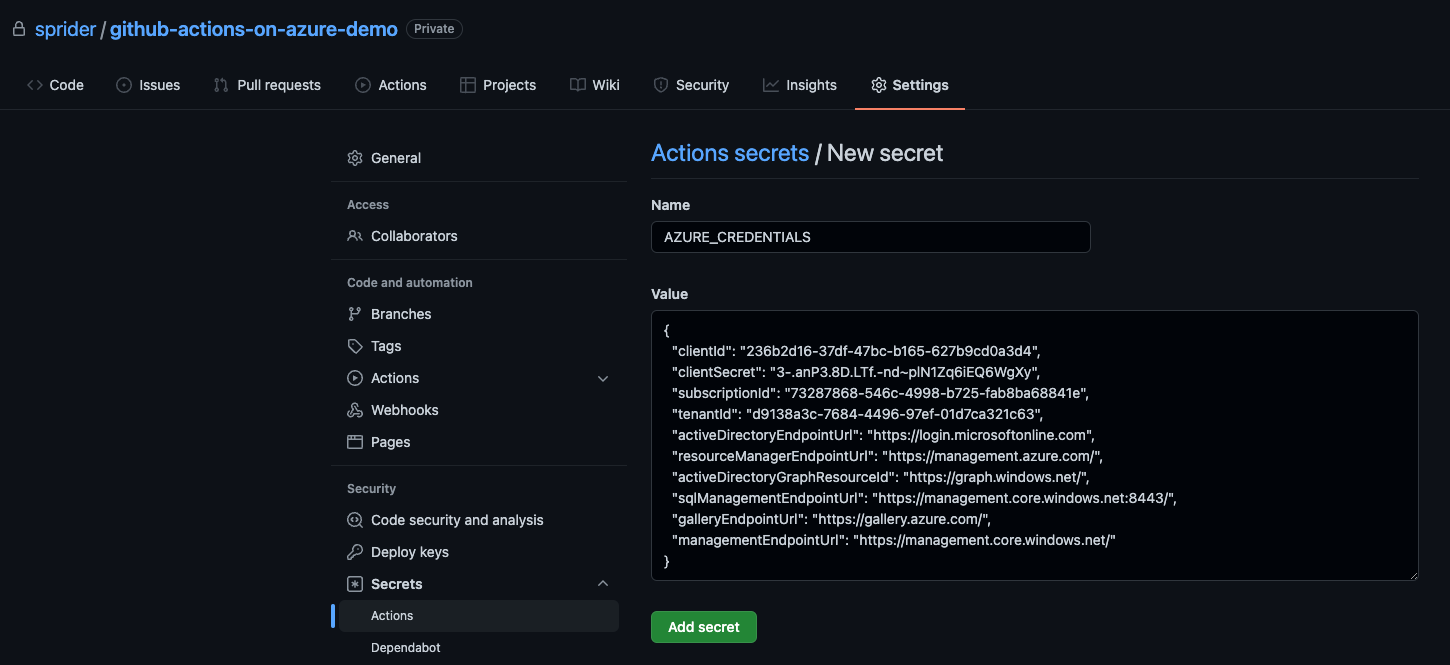
- Save by selecting Add secret.
Setup Azure Function App ARM Template and GitHub Actions Workflow File
An Azure Function is a programmatic function written by a developer for a single purpose. It’s then hosted and maintained on infrastructure by Azure. Microsoft takes care of maintenance and execution so that developers can deploy new code faster and easier.
To implement infrastructure as code for your Azure solutions, use Azure Resource Manager templates (ARM templates). The template is a JavaScript Object Notation (JSON) file that defines the infrastructure and configuration for your project. The template uses declarative syntax, which lets you state what you intend to deploy without having to write the sequence of programming commands to create it. In the template, you specify the resources to deploy and the properties for those resources.
A GitHub Actions workflow is a configurable automated process that will run one or more jobs. Workflows are defined by a YAML file checked in to your repository and will run when triggered by an event in your repository, or they can be triggered manually, or at a defined schedule.
The following workflow will checkout the code from your GitHub repository, login to Azure, and deploy the Function App using an ARM template.
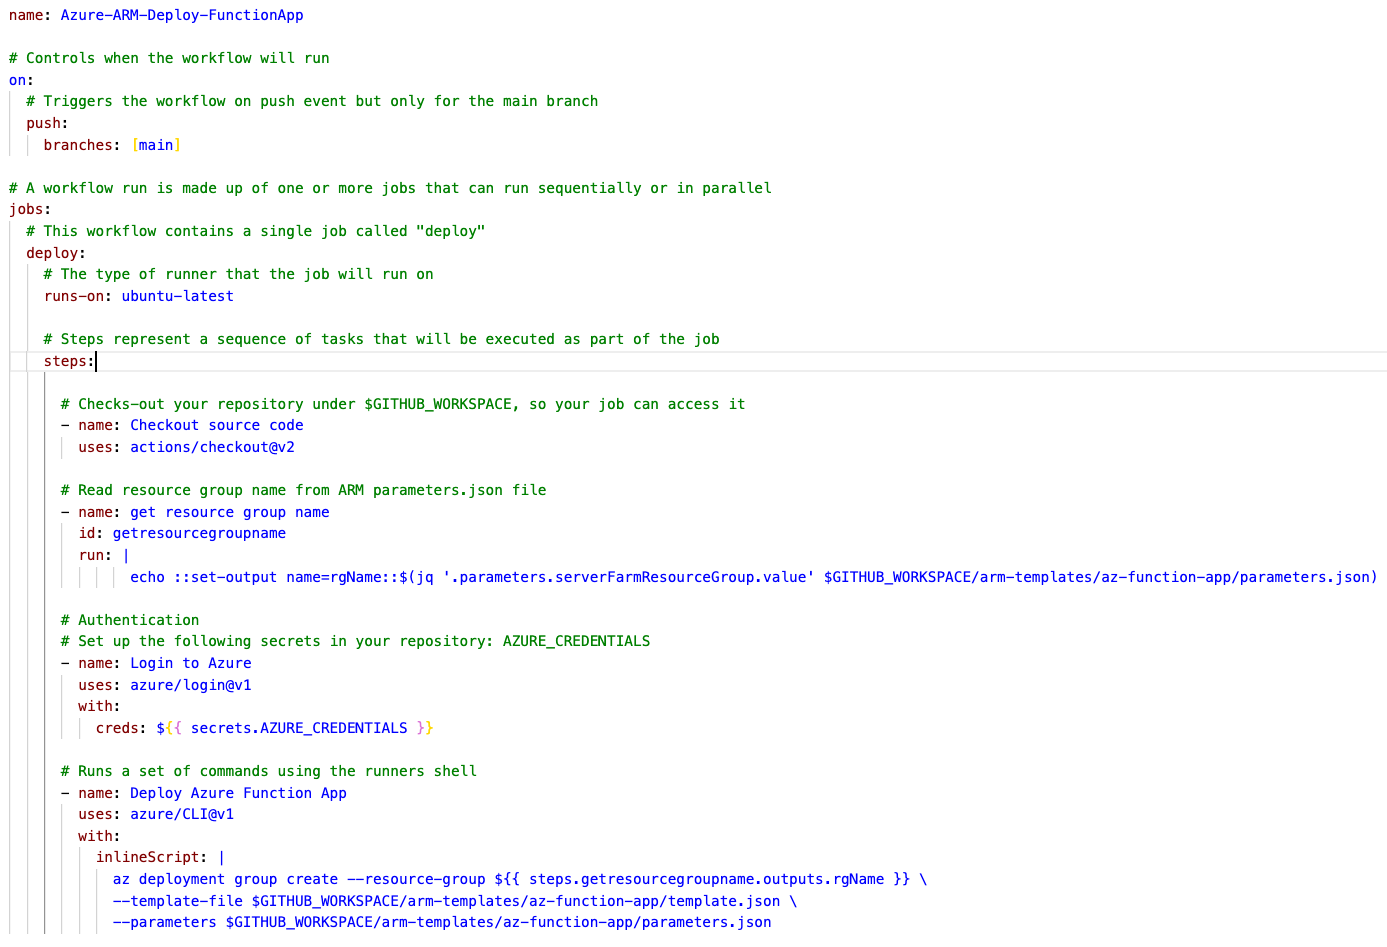
Let us clone your repository from GitHub to your local computer to make it easier to add, update or remove the necessary files, and push the changes.
- Open Terminal.
- Change the current working directory to the location where you want the clone the repository.
- Type git clone, and then paste the URL of your repository URL.
git clone git clone https://github.com/YOUR-USERNAME/YOUR-REPOSITORY
- Create the following folder structure and copy-paste the respective file contents from my repository.
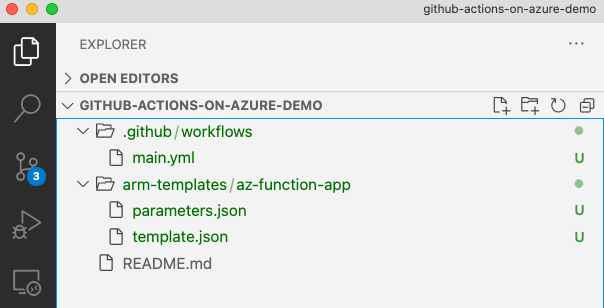
- Update subscriptionId in the parameters.json file (note: if required, update other parameter values as well).
- Commit the changes made.
- Push the commits made on your local main branch to a remote repository.
Outcome
You have now successfully pushed your changes to the git remote repository, which will automatically deploy your Azure Function App. The workflow should have triggered when we push a new commit to your GitHub repository.
If you go to Actions, you can see the workflow run and completed.

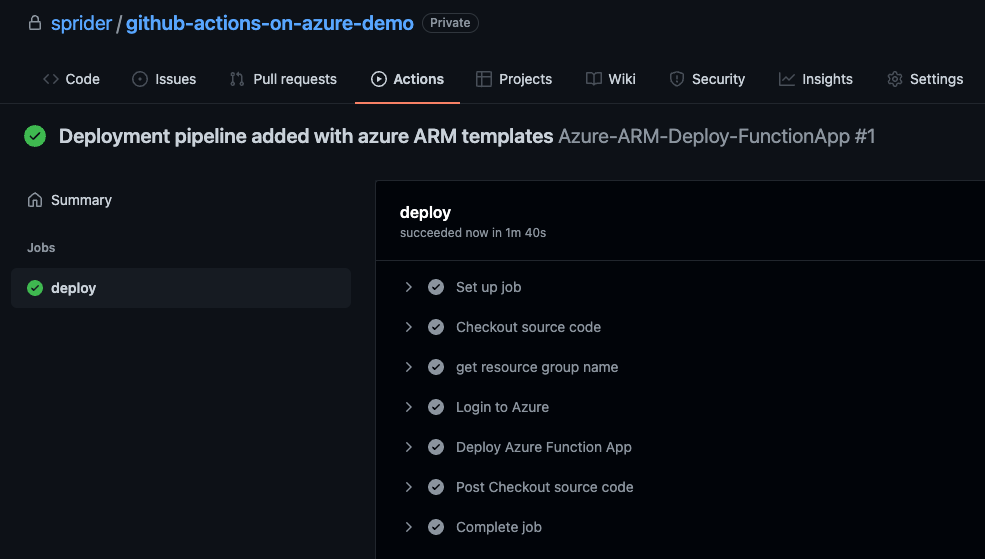
Once the GitHub Actions deployment workflow finishes running, our Azure Function App will be accessible.
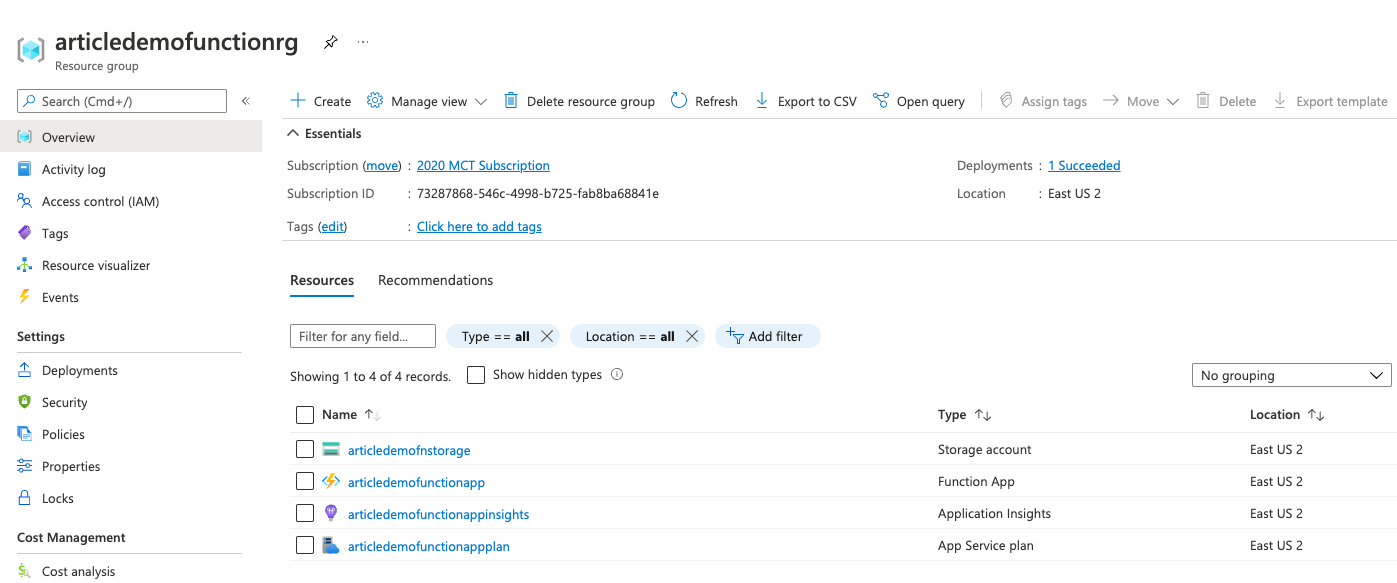
That was our GitHub Actions workflow. We have automated the provisioning of the Azure Function App using GitHub Actions workflow and Azure ARM templates. I hope you have learned a bit about GitHub Actions. If you have any thoughts, you would like to share; please let me know.
