Continuous Integration and Delivery is a method to frequently deliver apps to customers by introducing automation into the stages of app development.
- Revision Control
- Build Automation
- Automated Deployment
- Reduced Overhead
- Consistent Build Process
- Confidence and Team Communication
- Risk Mitigation
In this article, I am going to show you how to set up Continuous Integration and Delivery for SharePoint Framework Web Part using Bitbucket.
Prerequisites
- Bitbucket Repository
- SharePoint Framework WebPart Solution associated with the Bitbucket Repository – (Refer – SharePoint Framework HelloWorld example)
- SharePoint App Catalog Site to deploy the SharePoint Framework WebPart
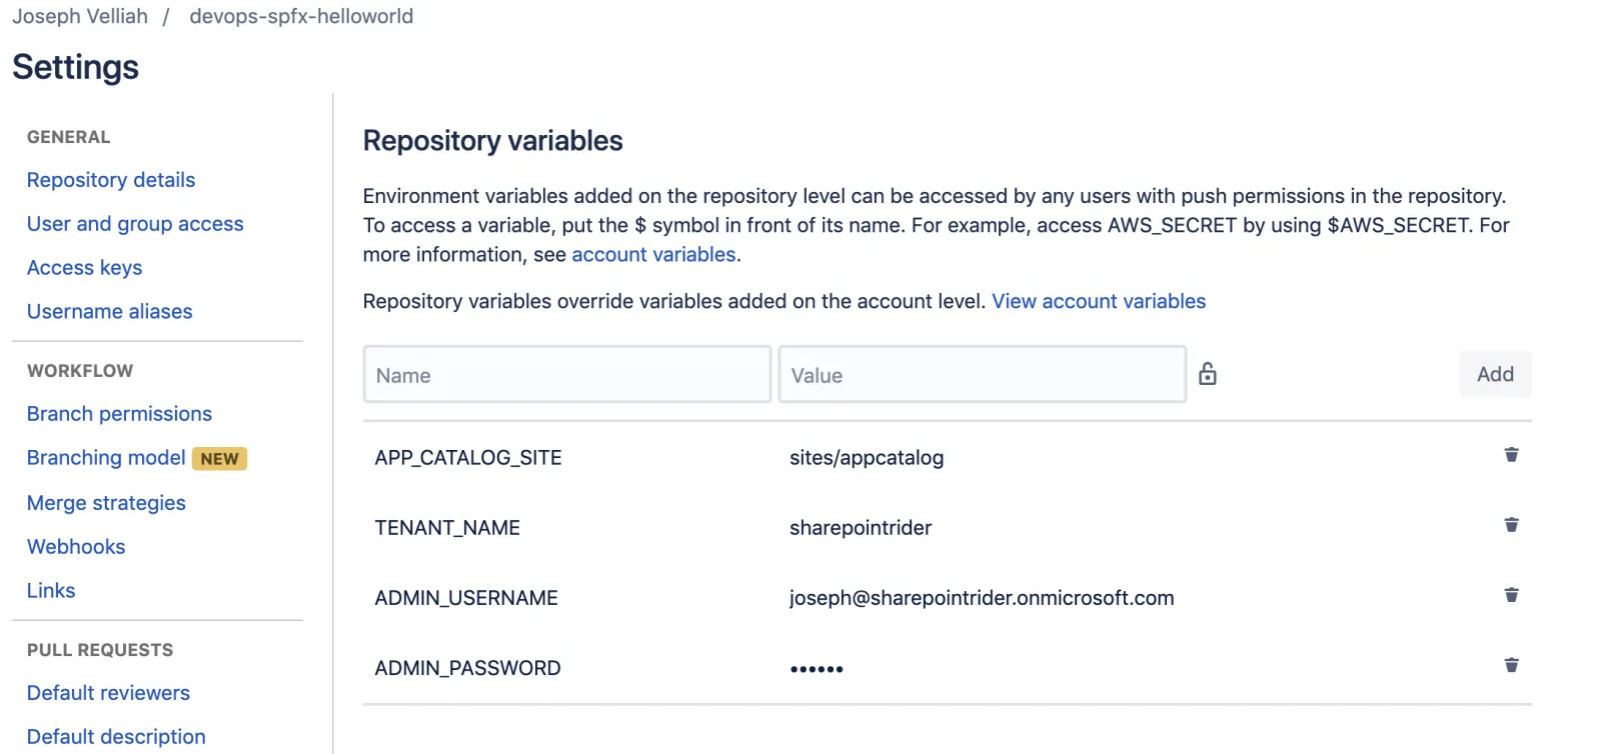
- Add the following environment variables on the Bitbucket repository level

At this point we are ready to integrate our SharePoint Framework WebPart solution with the Bitbucket Pipelines.
- Open the SharePoint Framework WebPart solution and upload the following custom gulp tasks provided by Elio Struyf. (Note: Install the necessary npm packages given in the instruction)
- upload-app-pkg
- deploy-sppk
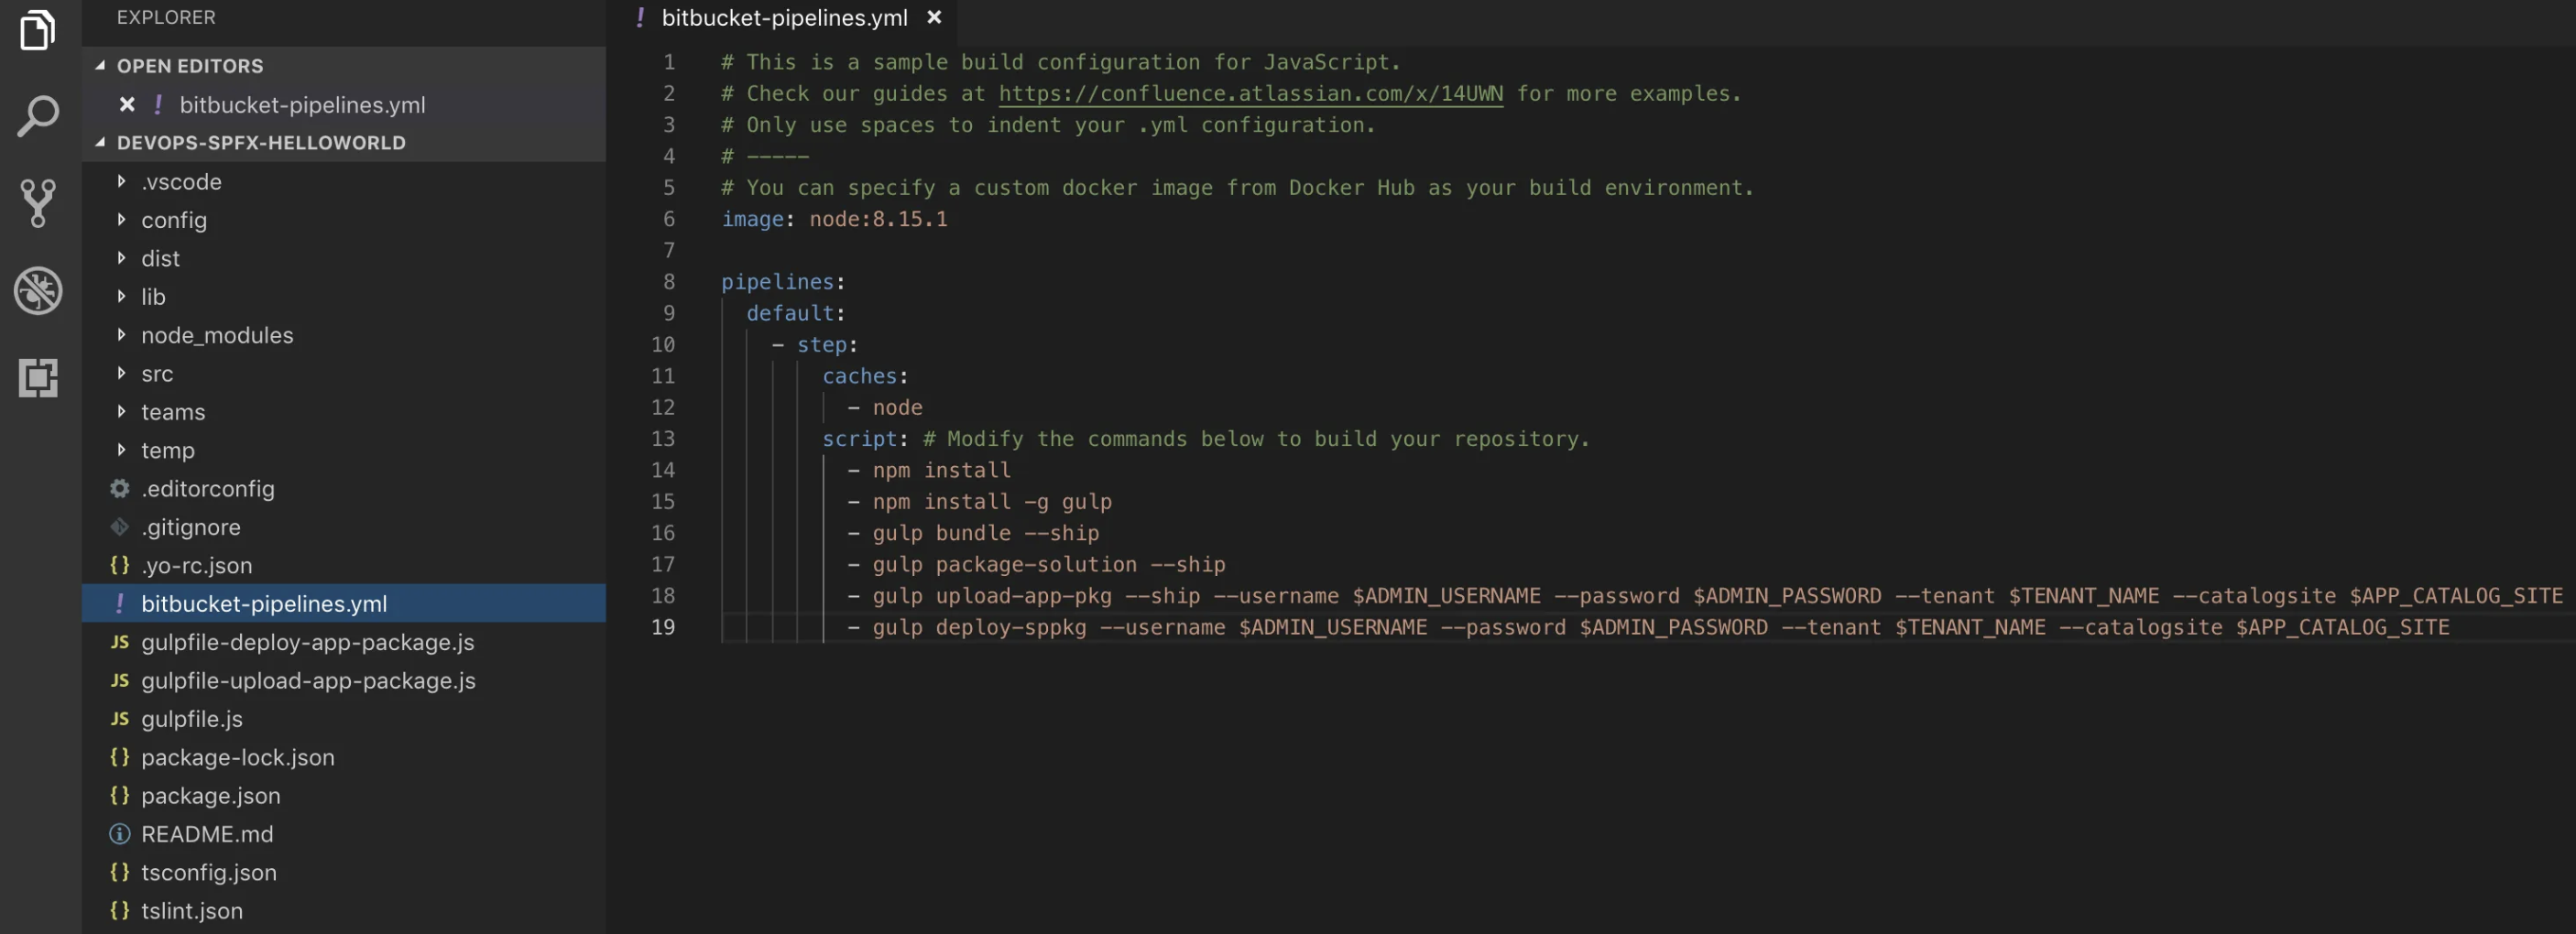
- Create a new file for Bitbucket build configuration with name bitbucket-pipelines.yml
- Update the bitbucket-pipelines.yml as shown below

- Commit and the push the changes to Bitbucket repository
- Go to the pipelines option and enable the pipeline

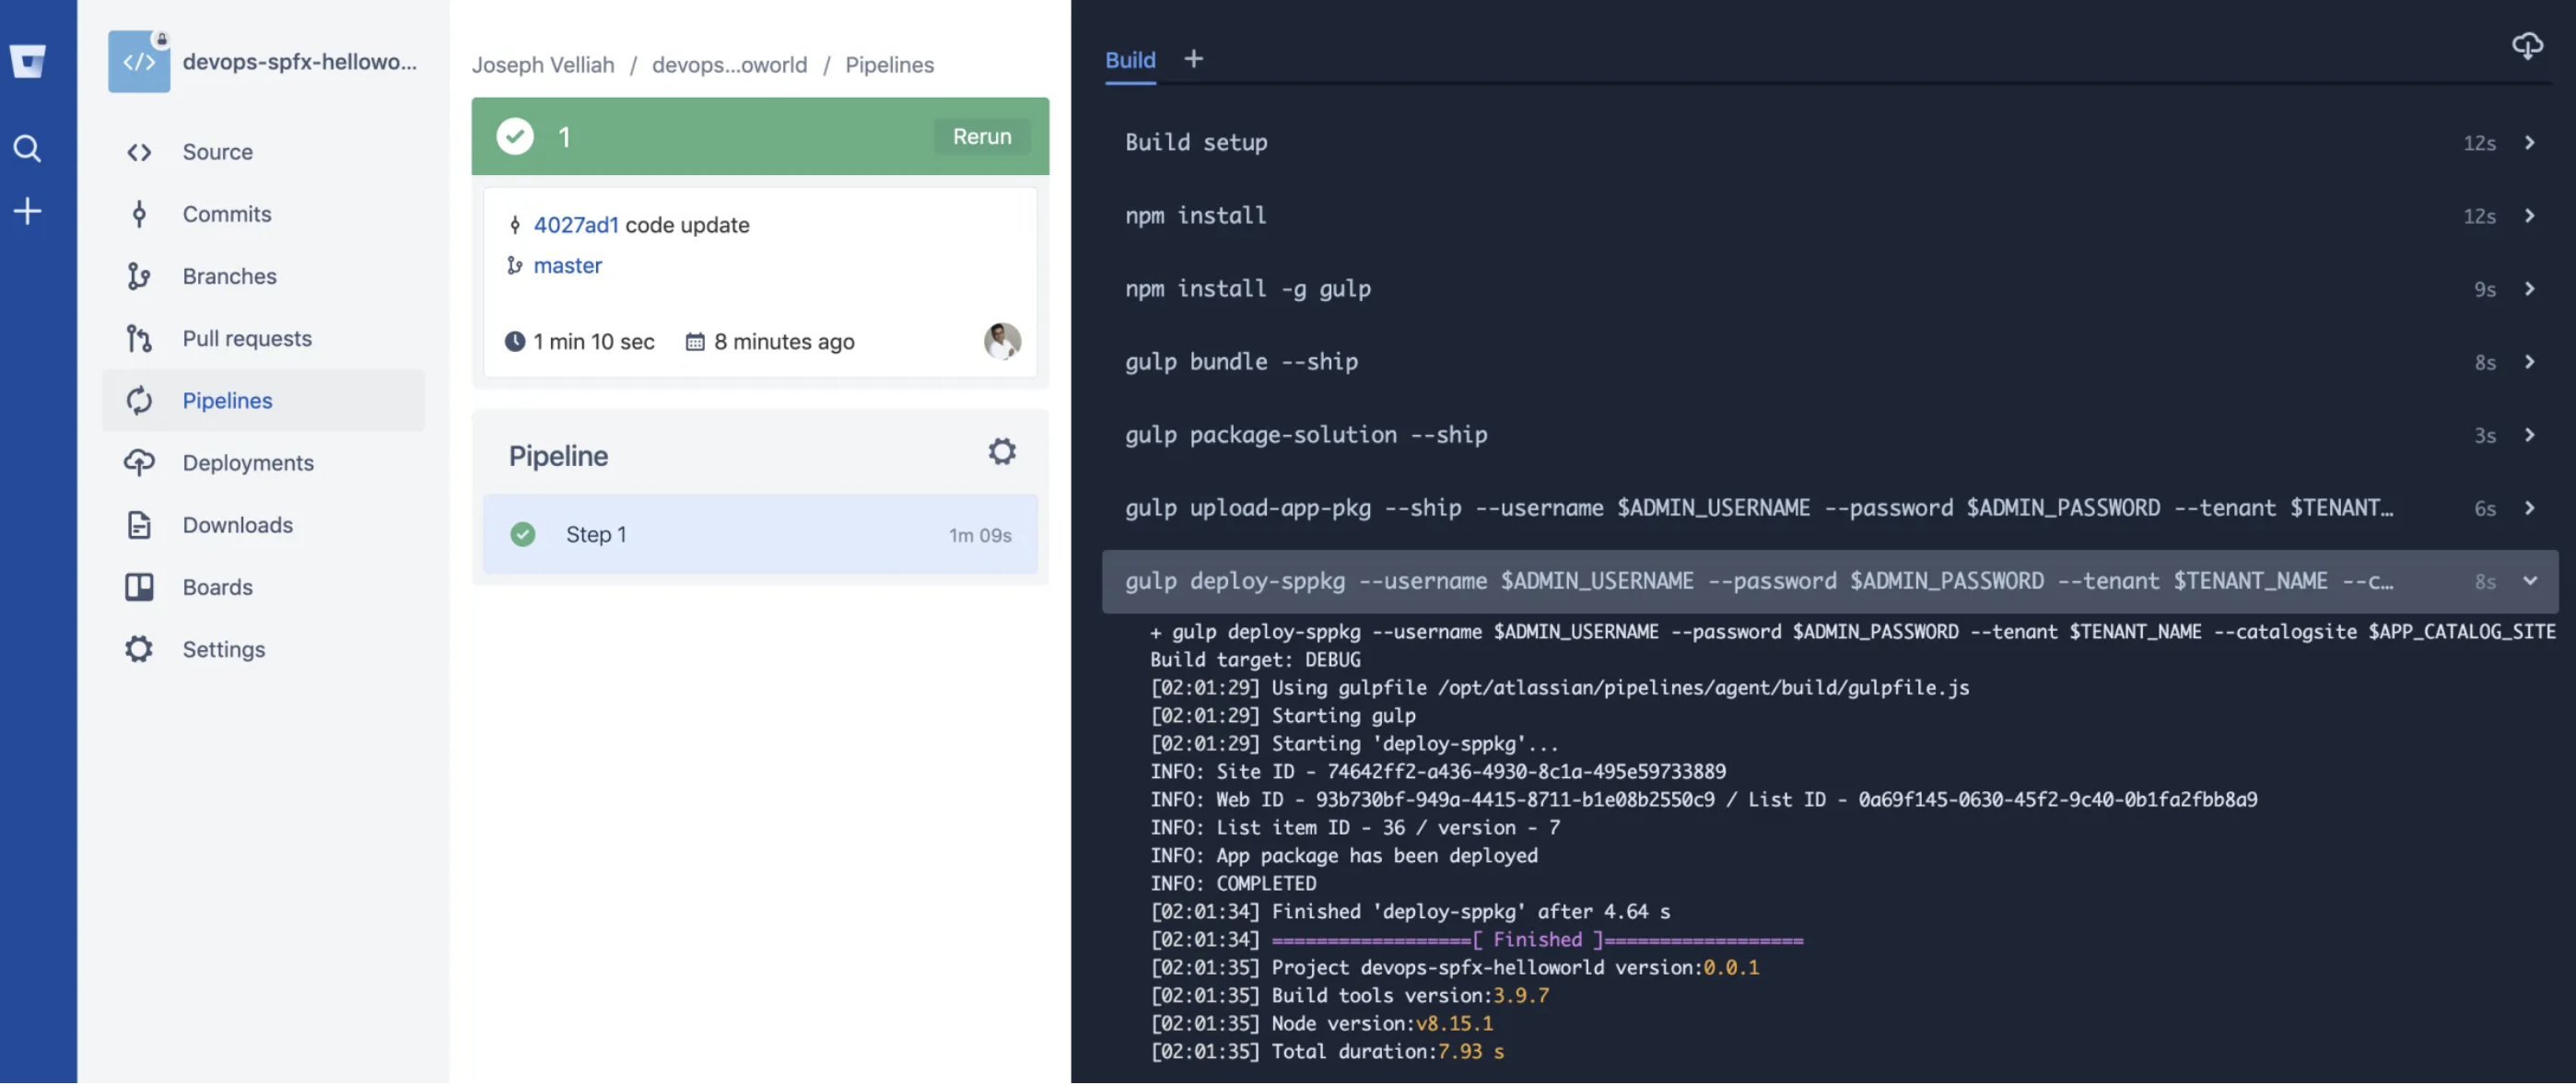
- A build should start as soon as we enable the pipeline as shown below

- As you can see in the screenshot, the SharePoint Framework WebPart is packaged and deployed in the app catalog site as per the logic written in the build configuration file

- It is possible to isolate the deployment process in a seperate step as explained here.
- Also schedule your pipelines to run a pipeline at hourly, daily or weekly intervals.
Hope you found this interesting.
Sharing is Caring!
